Friday, December 30, 2011

Potato Ham and Kale Soup


This soup was a last minute quick fix that turned out so well that leftovers were thoroughly enjoyed. This time making potato soup, I added a few sweet potatoes that needed to be used up and was pleasantly surprised at what a nice flavor they added to everything. I also added some leftover kale since I am always trying to sneak more veggies and greens into my kids' diet in ways that they do not notice them as much.


Ingredients:

1 large onion or 2 medium onions, diced
2-3 large celery stalks, sliced
2 cups chopped kale
5 large potatoes, cleaned and diced (peels left on if desired)
3 medium sweet potatoes, peeled and diced
8 - 16 oz. ham, diced (may use more or less if desired)
2-3 tsp Adobo seasoned salt (adjust to taste)
1/4 - 1/2 tsp black pepper
2 Tbsp dried parsley
8 cups water (approximately)
4-6 hard boiled eggs, diced
1/2 - 3/4 cup cream or 1 can of evaporated milk

In a stockpot, sauté onions, celery and kale in a couple tablespoons of butter or oil. After onion is translucent, add in the chopped potatoes, ham, salt, pepper, parsley and water. Bring to a boil and then reduce heat slightly, cooking until potatoes are soft. When finished, add in the hard boiled eggs and cream or evaporated milk. May mash the potatoes to desired consistency with a potato masher or handheld blender.


Thursday, December 29, 2011

Guacamole


Avacados are one of those foods that many people either like or dislike. I never really cared for them, and never even ate them until I was much older. That may explain why I have not been very fond of them in their unadulterated form. However, I have lately developed a taste for them in guacamole- if there are enough other ingredients and flavors present. This recipe is my version of guacamole as my husband and I have enjoyed it lately. Since avacados are so healthy for us- believed to be helpful in lowering cholesterol, full of the healthy fats our bodies need to function properly, great for heart health, may prevent cancers, high in fiber, as well as  high in lutein, which helps our eyes function properly- it makes sense to try to eat more of this fruit any way we can.

Ingredients:

2 large ripe avacados, pulp mashed
3-4 Tbsp lime juice (or lemon)
1/4 -1/2 cup plain Greek yogurt
3/4 cup chopped tomatoes (I used grape tomatoes)
1/2 cup chopped cilantro (may use dried cilantro, but is not as potent or flavorful)
1 1/2 tsp cumin powder
3/4 tsp salt (I used Adobo seasoned salt)
1/4 tsp ground black pepper
1/2 - 1 tsp green pepper sauce
1 medium red or sweet white onion, diced
1-2 cloves garlic, grated or put through a garlic press
(The above ingredients are only approximate amounts. You will need to taste and adjust them as desired.)


Mix all the above ingredients together and allow flavors to blend in the refrigerator for at least a few hours. Serve with corn chips or use with Mexican dishes.


Pin It

Saturday, December 17, 2011

South African Krunchies


This recipe came to me by way of some missionary friends to South Africa this past summer. Lindsey shared how she developed this recipe after enjoying them at local coffee shops. These are a popular type of sweet treat with each shop making their own versions. I have posted Lindsey's recipe, along with a couple additions of my own. When I made these, I was amazed at how good the flavors were and found myself going back for "just another bite". Since these contain oats, they are higher in fiber. Even though the original recipe was very good, I added walnuts and dried cranberries, which also add more antioxidants, vitamins and minerals. I can see where these bars would be a wonderful base for all types of add-ins.

Ingredients:


225 gm butter or margarine (or approx. 1 cup), may also use coconut oil
1 Tbsp golden syrup (pancake syrup) - I used King Syrup
1 tsp baking soda
1/2 tsp vanilla extract
1 cap-ful almond essence/extract- I used about 1 tsp
     Melt butter in microwave; stir in syrup (heat more if needed until syrup blends in). Add soda as well as vanilla and almond essence.


1 cup sugar
1 heaping cup flour
2 cups oats (I used quick oats)
1 cup coconut (I used unsweetened shredded coconut)
1/2 tsp salt
     Mix dry ingredients together. Then stir in the following:
1/4 cup chopped nuts (walnuts, almonds, pecans, etc), optional
1/2 cup or more dried cranberries- or may use other dried fruits instead, optional


Press into a 9x13 inch ungreased baking dish (I lined my pan with aluminum foil and lightly sprayed with nonstick spray). Bake at 350 degrees for 15 minutes.  Cool completely on wire rack and then may cut into bars. If desired, may use a simple confectioner's sugar and milk glaze drizzled over top. Store bars in an airtight container.


Serves approximately 15 larger bars or more depending if cut smaller.


Pin It

Friday, September 30, 2011

Sofrito


I finally was able to collect the ingredients and make this recipe. This is the "liquid gold" that I often cook with and recommend using in so many dishes to add exceptional flavor. I was introduced to it when my Puerto Rican friend taught me how to make Puerto Rican Rice and Beans (Arroz con Gandules). This mixture is really what provides so much flavor to many of the Puerto Rican and Dominican meals. While you might find it in jars on some of the grocery shelves, it has very little flavor and is a world of difference from the freshly made sofrito. Since it is much easier (and cheaper) to buy these items during the summer, it makes sense to make a big batch so you have enough to last through the winter. It keeps in the refrigerator for a long time and extra containers can be kept in the freezer for months (I had some that after a year was still good, but maybe not as strong).

This was a BIG batch!!

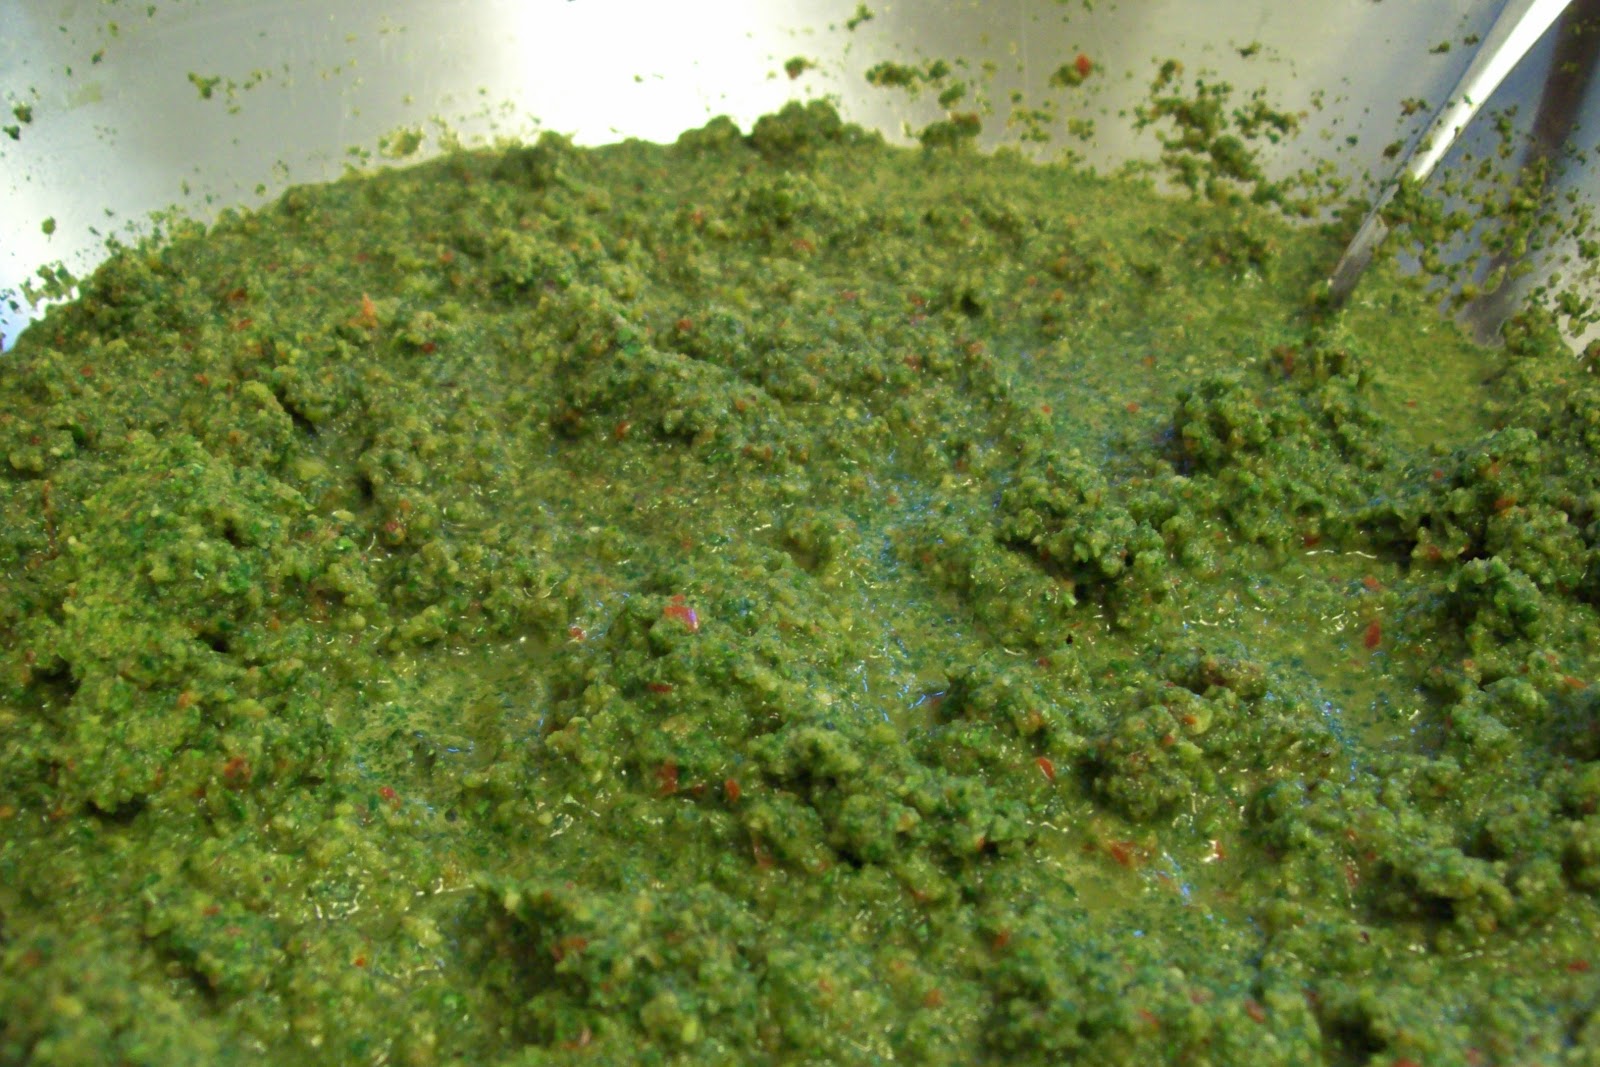
There are so many variations of this mixture but the commonality is the combination of green peppers, onions, garlic, cilantro and culantro (also known as recao, mexican coriander, long coriander, and the list of alternative names goes on). Many people also add a small pepper called aji dulce, which is usually found in hispanic markets. From here the variations continue with various herbs and seasonings. I have taken some recipes from a couple hispanic friends and made up my own. To make this, you need a good, strong blender or food processor. It also helps to have a helper or two to make the work go faster and enjoy some conversation!

When I was making this batch, I experienced a funny thing-- this huge batch of sofrito took most of the day for me to prepare all the ingredients and then blend them together. By the time I was part way through the blending process, I felt that the culantro (which has normally quite a strong smell) did not have much of any smell. Feeling frustrated with the fact that I was putting all this work into something that might not turn out very potent and we had bought PILES of this herb, I called my husband at work and told him to pickup some cilantro at the store on his way home. When he walked in the door and started helping me finish it up, he commented that it had a LOT of smell! So I ended up using all the culantro as well as the cilantro- just to be sure! Maybe my sense of smell was becoming immune to it after breathing it all for so long.

Suffice it to say, the amounts in this recipe are not exact and everyone uses a little different amounts of the various items. I have made sofrito previously and ended up with a more watery/bland sofrito. I later found out I used too many onions. So the watery vegetables are best used in smaller amounts so it does not water down the flavor of the spices. When this is finished and used in cooking, usually 1-3 Tbsp is enough for flavoring an average size dish. (I often use the heavier amount since I feel it adds a lot of flavor, but you have to go according to your tastes and how strong the sofrito is.)  I actually tripled this recipe and ended up with probably about a couple gallons of sofrito.

Ingredients:

* 4 green peppers, or part sweet red peppers
* 5 aji dulces (a small sweet pepper)
*  5 heads of garlic, peeled
*  2-3 large yellow or red onion
*  3 bunches of culantro/recao
*  1-2 bunches of cilantro (some people use the reverse ratio- 1-2 culantro bunches/3 bunches of cilantro)
*  olive oil
* small amount (small blister pack) of fresh oregano, stems removed (may use dried if fresh is unavailable)
* 1 stalk of celery
*  1/2-1 bunch of flat leaf Italian parsley
*  optionally 1/2-3/4 tsp Italian Herb blend, 1/2 tsp cumin

Directions:

After all the ingredients have been cleaned/prepared and large items chopped into chunks, begin by putting some peppers, onion, garlic and herbs in a blender or processor and gradually add in some olive oil until it will blend enough to make some juices. As it gets more wet and liquified, then you can add the other things. However, you will need to work the mixture, moving it around some with a spatula and loosening any pieces that may have become lodged around the blades. 

If the blender becomes too full, pour out about half and add in more chunks, you may need to put some of the liquid mixture back into the blender in order to get the new additions blending properly and not tax your blender too much. Usually, a good food processor will not have much problem with this, but blenders will burn out quickly if they are strained too much and may leave chunks of food at times. 

When it is finished, divide into smaller lidded container that will keep in the freezer and reserve some to keep in the refrigerator for use immediately. So people keep old ice cube trays to freeze it in and then put the blocks into plastic bags. Once you use some plastic to store the sofrito, it will be difficult to remove that smell from it later. So I keep some containers just for use with sofrito.


**Some of the specific uses might be (of course) Puerto Rican and Dominican style Rice and Beans, just bout any dish that uses ground beef, put it under the skin of poultry before roasting, chicken soup/broth for a little different flavor, and the list goes on.

Have fun experimenting!


Pin It

Stuffed Eggplant


Between our garden providing quite a few lovely eggplant this summer and my husband not being able to pass up some reduced eggplant in the produce aisle at our grocery store, we have had our share of eggplant to eat up. So I was thinking about some of the different ways to prepare this and was not having much success with anything that struck my fancy. While talking to my Iraqi friend, she mentioned that she will sometimes prepare eggplant stuffed with rice and meat. The light bulb went on inside my head, and I remembered that I had some leftover prepared Kasha (buckwheat) pilaf mixed with ground beef that would probably be wonderful inside the eggplant. I contemplated using some Turkish spice mixture I recently purchased, but noted that it had some cayenne pepper and was not sure how hot it would be. Since my children will not eat anything too hot, I decided to skip this and used some Greek seasoning, as well as some Za'atar seasoning mix to coat the inside of the eggplant.

I was very happy with the results, and my entire family seemed to really enjoy it, also. Note that I had prepared the buckwheat as on the box's instructions with beef broth instead of water and also had added some seasoned salt, as well as the chopped vegetables- carrots, celery, onion, garlic. The ground beef was cooked with seasoned salt and "Sofrito"- a blend of garlic, onion, green pepper and many other spices blended together. So both were already flavorful. Rice or other types of grain like quinoa or couscous would also be wonderful and would be best seasoned well as it is cooked.


Ingredients:

* 2-3 larger eggplants, cut in half and hollowed out, saving the inner flesh (I also used some yellow summer squash that I cut in half and removed the seeds)
* 2-3 cups buckwheat Kasha pilaf prepared or other types of cooked grains
* oil
* Greek seasoning blend- may use instead Italian herb blend, seasoned salt or oregano, garlic powder, parsley, pepper, thyme, marjoram
* Za'atar seasoning- contains sumac, thyme, sesame seeds and salt (optional)

Directions:

Preheat oven to 400 degrees F. Grease a 9x13inch pan and arrange eggplant or squash pieces in the pan. Chop any eggplant meat that was removed into chunks that will be placed on top at the end of preparation. Spread oil over the inside of the eggplant/squash and then begin seasoning them liberally with your desired seasonings/herbs. Mound up the Kasha or prepared grain over top of the eggplant or squash and place any extra into the pan around the eggplant. Put the chopped eggplant meat that has been tossed with some oil over top of the grain mixture and then sprinkle with more seasoning/seasoned salt. Grease/oil some aluminum foil and cover the pan and bake for approximately 30 minutes. It may require more or less time depending on the size and thickness of the eggplant. You may check occasionally after 25 minutes by pricking with a fork. When the eggplant is soft, it is finished baking.

Serves 4-6 people.  Is good with a salad and some flatbread.

**Buckwheat is not very popular in the U.S. but is loaded with fiber, omega-3 fatty acids, B vitamin and minerals. I was surprised to learn that it is not a grain but actually the fruit seed from a plant originating in Asia. It has a little stronger flavor but is really tasty when prepared using the whole or coarsely ground kernels. I prefer it best cooked with either beef or chicken broth and plenty of herbs/seasoned salt. Many people also use the buckwheat flour for pancakes or cook the whole kernels (groats) for a hot cereal. In some cultures, it is used to make noodles and is also cooked in soups.  Try google-ing buckwheat health benefits if you are interested in more information. You will find so much information and other ways the grain is used.

Pin It

Monday, August 22, 2011

Freezer Pickles


This is the season for an abundance of cucumbers in my garden. We have been eating these with tomatoes so many meals, and I was looking for an easy pickle recipe that could use a lot of them at once without getting out the canner and heating up the kitchen. Unfortunately, the extreme heat during July adversely affected my pickle cucumbers, causing the plants to die out before I was able to get more than a few off the plant. I had tried a couple long cucumber varieties, but was disappointed to find that they would grow much larger around on one end, having a larger seed section. Anyways, since I have so many of these larger cucumbers, I decided to try using them in the pickle recipe.

My sister-in-law shared this recipe with me, and I did not see how they would have flavor and be crunchy. However, they turned out very well- crunchy with a nice slightly tangy/sweet flavor, resembling the bread and butter pickles. The onions look like they would still be raw but they have a crunch with the flavor of the pickle juice- nothing like a raw onion. In addition, I did not add in the green peppers but added some mustard seed to the mixture. After storing these in the refrigerator and stirring them everyday for 4 days, you can put them into freezer containers, or I have just kept some in the fridge and they are still great indefinitely. I also used a crinkle cutter blade and even removed some of the seeds on some of the larger cucumbers and simply cut them into some chunks.


Ingredients:


7 cups sliced cucumbers
1 cup onions, sliced (may use sweet or cooking onions)
1 cup green peppers, sliced (optional)
        
      Place the following ingredients in a large 4-5 quart bowl with a lid: 
1 cup white vinegar
2 cups sugar
1/2 Tbsp salt
1 Tbsp celery seed
1 Tbsp mustard seed (may use less, optional)
       Combine ingredients in a saucepan and bring to a boil. Boil about a minute or until the sugar has completely dissolved, stirring well. Cool it down somewhat. (The recipe says cool completely, but I poured it over while still warm.) Pour syrup over the cucumber mixture and stir around. (The cucumbers will be higher than the liquid.)  Put in the refrigerator.
     Once a day, remove from the refrigerator and stir cucumbers, bringing the cucumber slices on top to the bottom. You will note that the cucumbers will add to the liquid and eventually the liquid will cover the cucumber mixture. On the fourth or fifth day, you may put them in freezer containers and then freeze. When ready to eat them, remove from the freezer and allow to thaw before serving.


The challenge with this recipe will be having enough pickles left at the end of the 4 or 5 days to actually freeze- if you can resist nibbling along the way!


Pin It

Thursday, August 11, 2011

Broccoli Salad


This broccoli salad has been in my family for a long time. I am not really sure where it originally came from, but it may have been from a church cookbook my mom has that includes many Pennsylvania Dutch recipes. This salad has a dressing that is typical of the Amish/Mennonite salads with a creamy and mildly sweet/sour flavor. I have seen and tasted many variations of this salad and many are equally tasty. This picture shows it with only the ingredients listed on the recipe I have. However, I have seen it made with sunflower seeds or other types of dried fruit.

Many people, especially children, do not enjoy the flavor of raw broccoli. This salad is a great way to get some people to eat vitamin-rich broccoli with the added benefit of some protein from the peanuts. My children like this better than plain raw broccoli, and it is a nice dish for potluck dinners.


Ingredients:                                                        Serves: approx. 8
  • 1 very large or about 3 small heads of broccoli, rinsed and chopped, removing the thick and hard stem first. (I use the smaller stem parts that do not have such thick-skinned and chop them small.)
  • 1/2 cup finely chopped onion
  • 1/2 cup peanuts
  • 1/2 cup bacon bits
  • 1/2 cup golden raisins
Mix above ingredients together.

To make dressing, mix the following together:
  • 1 1/2 cup mayonnaise
  • 1/3 cup sugar or zylitol or other granulated sweetener
  • 3 Tbsp vinegar (I have used either white wine or apple cider vinegar with good results)
Combine the dressing with the other ingredients and then allow to marinate in the refrigerator for several hours. This salad lasts well for some time.

** Another great variation is to use red onions, dried sweetened cranberries and chopped cauliflower and leave out the nuts and raisins.


Pin It

Tuesday, August 9, 2011

Mexican Bean Salad


I do not know how authentic Mexican this dish is, but it combines some of the flavors of mexican food, including chili powder, cumin, lime and lemon juice, as well as cilantro. I was introduced to this dish by my sister-in-law earlier this summer and instantly fell in love with it. It is great for those hot picnics when you do not want to worry about salads spoiling. Plus, it is great made up a couple days ahead, if needed.

This recipe originally was taken from Allrecipes.com submitted by Karen Castle on http://allrecipes.com/recipe/mexican-bean-salad/detail.aspx. I added some yellow pepper, a little extra lemon juice, as well as extra cilantro, chili powder and cumin. This is not a "hot" or very spicy salad- although you could add extra green pepper sauce/hot sauce and adjust the spices as desired. It really is a nice mix of flavors that will appeal to most people who enjoy a little flavor.

Serves about 8

Ingredients:


  • 1 (15 ounce) can black beans, rinsed and drained
  • 1 (15 ounce) can kidney beans, drained
  • 1 (15 ounce) can cannellini beans, drained and rinsed
  • 1 green bell pepper, chopped
  • 1 red bell pepper, chopped
  • 1 (10 ounce) package frozen corn kernels
  • 1 red onion, chopped
  • 1/2 cup olive oil
  • 1/2 cup red wine vinegar
  • 2 tablespoons fresh lime juice
  • 1 tablespoon lemon juice
  • 2 tablespoons white sugar
  • 1 tablespoon salt
  • 1 clove crushed garlic
  • 1/4 cup chopped fresh cilantro
  • 1/2 tablespoon ground cumin
  • 1/2 tablespoon ground black pepper
  • 1 dash hot pepper sauce
  • 1/2 teaspoon chili powder

  • 1. In a large bowl, combine beans, bell peppers, frozen corn, and red onion. 
2. In a small bowl, whisk together olive oil, red wine vinegar, lime juice, lemon juice, sugar, salt, garlic, cilantro, cumin, and black pepper. Season to taste with hot sauce and chili powder.
    3. Pour olive oil dressing over vegetables; mix well. Chill thoroughly, and serve cold.

    Optional- A previous time I made this recipe, I added cooked ditalini pasta, which soaked up some of the dressing and added great texture and flavor, as well as made the salad go a little further.


Pin It

Monday, August 1, 2011

Zucchini Pancakes or Fritters


These zucchini fritters are a quick and easy meal and a great way to use up some extra zucchini. We planted just a couple zucchini plants and are hardly able to use it all. Some of the ones that grew larger before I could pick them, I took the seeds out and grated them up. Of course, I love zucchini made into sweet bread/cakes, but sometimes, it is nice to try something different. This is really a simple dinner that my husband grew up eating in the summer when everyone was busy working on the farm. This is mostly zucchini with just enough pancake mix and water to make a batter to hold it together. If you are using the larger zucchinis that have more moisture, you will not need to add much, if any water. My other addition this time, was some grated onion into the batter, as well as some dill. What a nice flavor, especially with a little sour cream!


Feel free to use any type of pancake mix. I just had some Fiber One that I wanted to use up. Later, I plan to start making my own bulk pancake mix.


Ingredients:

(This is not an exact recipe- it depends on how much zucchini you have and how much batter you want to make. So mix some up and see if you need to add more of an ingredient.)

2 medium sized zucchini, washed, deseeded and grated
pancake mix
1-2 eggs
1-2 tsp dried dill
1-2 tsp salt
1/4-1/2 tsp pepper
1 medium onion, grated
water, if necessary to make the batter the right consistency.
sour cream, if desired for topping

In a large bowl, mix the grated zucchini, eggs, seasonings and onion. Stir well and gradually mix in enough pancake batter to achieve the proper thickness (enough to hold the zucchini together but not too thick). You may add a little water if necessary. Pour onto a griddle or frying pan that has been coated with a little butter or oil. Cook over medium heat as you would pancakes, flipping when the top begins to bubble.

Serve with tops of pancakes buttered and a little sour cream on top.

Pin It

Thursday, July 14, 2011

Mango Salsa


To me, there is nothing like fresh salsa. I love all the bright flavors of fresh onion and cilantro that you cannot get with jarred salsa. When I have a large amounts of tomatoes, I will sometimes use them up in some fresh salsa. It is not really hard to make, other than the time to chop everything. Sometimes when I get the desire for some and do not have any fresh tomatoes, I will BRIEFLY consider buying some at the grocery store. However, the price is simply outrageous! So I walk away until I either find some tomatoes on sale that look ripe enough or until they are in season. As I write, I am eyeballing some lovely tomatoes growing on my numerous plants and salivating over the first fruits of my tomato crop this year.

I must admit that in the past I had never been one who loved mixing sweet and savory flavors together- although I am beginning to try more such foods and really enjoy them. One of these was a pineapple salsa. I was amazed at the great flavor that pineapple and tomatoes gave each other. Then my husband came home from work and told me he just had the best salsa EVER! and I must try making it. It turns out that a coworker's wife made it and was gracious enough to share her recipe for Mango Salsa.

I have modified it according to what ingredients I had on hand. Instead of the typical larger mangoes found in many grocery stores, I used a couple small bright yellow mangoes I found at the local Indian grocery. I realized later that they are not as sweet as the larger greenish/yellowish/rosy pink ones. So this affected the final flavor in my salsa. Next time, I will make it with the sweeter mangoes. I also did not soak my red onion in water/vinegar solution, as I thought I would like the onion flavor to come through more. I also may have used more chopped cilantro- just eyeballed some of the amounts and kept tasting it. Since I did not have a jalapeño, I used a couple shakes from a bottle of green pepper tabasco sauce, which gave a hint of heat.  I also added a large clove of garlic, put through a garlic press, which gave a little more zing.


Jin's Mango Salsa Recipe (makes 4-6 servings)

1 ripe large mango diced ( or 2 medium size)
5 tomatoes diced (remove seeds to prevent making soupy salsa)- more needed if using smaller plum tomatoes
1 medium sized red onion chopped
(*soak in water vinegar solution for 10 min to remove pungency)
1/2 cup of cilantro chopped
1/2 tsp. salt & 1/2 tsp. black pepper
1 jalapeño finely chopped
1 lime, juiced

Mix, and enjoy


  • As an aside, I just found out recently that there are many different varieties of mangoes, although not so many are available in U.S. grocery stores. However, they are all rich in Vitamin A, B-6, E, C, potassium and copper, as well as antioxidants that help prevent numerous types of cancer, including colon and breast. It is also rich in prebiotic fiber, which is beneficial to our colon health.
  • It is wonderful put in smoothies, blended with milk, and added to fruit or vegetable salads.
  • Feel free to check out the following link http://www.nutrition-and-you.com/mango-fruit.html for more helpful information on mangoes and how to use them.


Pin It

Thursday, June 16, 2011

Rustic Turnip Greens and Vegetables with Quinoa


Well, I could not pass up a great deal on frozen turnip greens at my local discount grocery while ago- a HUGE  3 pound box for only $1.79! Normally I might have to pay almost that much for a 1 pound package of some frozen greens. So I bought 3 boxes-- later wondering for a minute how I was going to use 3 pounds at a time. However, since it was such a good deal, I did not spend much time on the small details.  ;)  When I started thinking about what I could use them to make, I remembered that turnip greens have a slightly bitter flavor as compared to spinach or kale. So I began to think more about how I could incorporate them into things that my children might eat and not complain too much! While I had previously used these greens in soups and eaten them sautéed with bacon, I was looking for something a little different and some way that I could use up a lot of them without eating a huge pile of them by themselves.

So this is the huge block of turnip greens, partially thawed.

After perusing the internet for ideas, I decided it would be good to mix the greens with some other vegetables (including some that have a little natural sweetness to help offset the bitterness of the greens) and a little ham for extra flavor. Then I thought it might also be nice to have a little milk or cream sauce- I ended up making a white (béchemel sauce) to mix in at the end. In the process of adding this and that, I got the idea to throw in some quinoa, which I have on hand but do not use as much as I would like to. This ended up being a perfect addition- not really enough to stand out but still there adding some great nutrition.

As is often the case, my dish ended up to be a HUGE pot that we will be eating on for a little while. I used probably about 1 1/2 pounds of the greens. If you have a "normal" amount of fresh greens or frozen- like 1 pound or less, than you will have a more reasonably sized dish. I have attempted to cut my amounts in half, which may still make a normal "family-sized" amount. This dish can be a main dish or used as a side to other foods. I was pleasantly surprised to find out that both of my children, although initially were a little hesitant to try it, ended up eating it very well and commented on how good it was. Feel free to leave out items or add in other foods, as desired.

The large crockpot it started in- had to be moved into another pot to finish on the stove.

This is something that can be started in the morning in a crockpot and be ready in 4-6 hours on high or 8 hours on low. However, I had to switch over to a pot on the stove since I did not get it started early enough and needed to speed up the cooking process. I am notorious in my family for my soups/dishes that start in one pot, then have to be moved into a bigger pot- sometimes multiple times.
Serves 4-6
Ingredients:
  • 12-16 oz. or a good-sized clump of turnip greens, the hard center rib removed, rinsed well and then the greens chopped (or use frozen chopped greens)
  • 3-4 med-large potatoes, cleaned and cut into chunks
  • 1/4 cabbage, coarsely sliced/chopped
  • 3 carrots, peeled and sliced
  • 2-3 ham slices, cut into chunks
  • 2-3 sweet potatoes, peeled and chopped (I used some leftover cooked ones, about 2 cups)
  • 4-6 cups water
  • 3-4 chicken bouillon cubes
  • salt/seasoned salt (1-2 tsp to cook in with potatoes, then to taste at the end)
  • 1/4 cup zylitol or other sweetener (more or less, helps cut the bitterness of the greens)
  • 1/4-1/2 cup quinoa, rinsed and drained
  • 4 hard boiled eggs, diced
  • 2 medium onions, diced and sautéed in 2 Tbsp butter, a little salt until they begin to almost carmelize
  • 1 Tbsp minced garlic
  • 3 Tbsp butter
  • 2 1/2 Tbsp flour
  • 1-1 1/2 tsp salt
  • 1/4 tsp pepper
  • 2 1/2- 3 cups milk
  • 1/4 tsp nutmeg
Instructions:
  • Assemble the first 11 ingredients and put in a 6-8 quart soup pot, adding enough water to cover the potatoes/vegetables. Begin cooking on the stove on medium-high (or put in the crockpot) and cook until the potatoes/other vegetables are tender- approximately 35 minutes. Watch closely to make sure there is enough water and stir occasionally. 
  • While vegetables are cooking, prepare the hard-boiled eggs and sauté the onions and garlic. 
  • Then start preparing the white sauce- in a saucepan, melt the butter, add in the flour and whisk together. Continue to cook over low-medium heat while stirring the roux for a couple minutes. 
  • Then begin to gradually add the milk, stirring constantly. Bring to a boil and then lower heat to medium low, continuing to cook for about 10 minutes, stirring regularly. When finished, add in seasonings. 
  • When the vegetables are finished, add in onions, hard-boiled eggs and white sauce. Mix together and serve with some crusty bread, if desired.

* Turnip greens are an amazing food- so full of nutrients that they really are another one of the "superfoods". Feel free to check out the site I found that does a wonderful job at detailing just how good this food is- http://www.whfoods.com/genpage.php?tname=foodspice&dbid=144  I did not realized that it is the turnip green's high calcium content that contributes to its bitterness. It is also very rich in cancer-fighting nutrients. So cheers to the humble turnip greens!

Friday, May 27, 2011

Pulau Basmati Rice (Nepali Rice)


I was recently introduced to VahRehVah.com, which is a great website by Sanjay Thumma with great Indian recipes, as well as ones from other countries in the region. His videos are very helpful and are a wonderful resource for people wanting to learn more about cooking Indian cuisine. 

Biryani is a layered meat/sauce and basmati rice dish that is baked and becomes so flavorful. I have been wanting to make this dish for some time,  but I had some leftover cooked chicken that I was trying to use up, which did not seem to fit with a biryani dish. So when I can across the Pulau recipe, it was just what I was looking for. Sanjay's version did not have any meat included, but I added the chopped cooked chicken with the other ingredients in the rice to make a more complete meal. I also added some cardamom seeds and cumin seeds and some leftover chopped canned tomatoes with lime and chipotle flavor. So the link to Sanjay's original Pulau Basmati Rice is http://www.vahrehvah.com/Pulau++Basmati+Rice+:2688. What follows is my adaptation of his recipe. Because I used brown basmati rice, the cooking time was longer and I had a little difficulty getting the grains on top to completely cook, despite adding extra water. I love the flavor of brown basmati rice and it is full of nutrition, but the only place I found it was at the local Indian grocery store. If you use this, just be aware that it takes longer to soak and cook.

Ingredients:

1 medium-large onion, chopped
1-2 Tbsp oil
3/4 tsp whole cumin seeds
3 whole cardamom pods
2 whole cloves
1 bay leaf
1 large (approximately 4 inch) cinnamon stick, or a couple smaller ones
1/3 cup mixture golden and dark raisins
1/2 cup cashews, broken or pieces are alright to use
1 1/2 cup basmati rice
1 tsp salt
2 chicken bouillon cubes
2 1/4- 2 1/2 cups water
1 cup chopped cooked chicken (had already been cooked previously with fajita seasonings)
1/2 cup chopped canned tomatoes with lime and chipotle

Soak rice in a bowl covered with water for about 30 minutes, draining it in a fine mesh strainer and then soaking in fresh water after about 15 minutes. In a large pot, sauté onions and oil, adding in the other spices and stirring together. As the onions are becoming translucent, add in the raisins. Drain the rice and put into the onion mixture. Add salt and continue to stir around in the frying pan for a couple minutes. You may need to add another Tbsp of oil at this time. Then, if using some canned tomatoes, put them in the measuring cup first, then add the necessary amount of water to equal the total amount needed. (Start with the lesser amount first, and add more if necessary after rice has cooked about half the time). Add all the liquids to the rice mixture, as well as the chicken, chicken bouillon and nuts. Stir well and bring to a boil and make sure the bouillon cubes have dissolved. Cover and reduce heat to a simmer for about 20-30 minutes. Give the rice a good stir after about 12 minutes and if much of the liquid has dissolved and the rice that was on top is still not very soft, then you may add about 1/4 cup water. Cover and finish cooking for another 15 minutes or until rice seems soft but not mushy. 

To serve, remove bay leaf and other whole spices (cloves, cardamom and cinnamon). The cumin seeds are very small and do not need to be removed. Serve on a platter and garnish with chopped cilantro, if desired. It is also wonderful accompanied by the Indian breads- either naan or paratha, warmed in a skillet and spread with a little butter. I have shown both the naan (the white colored flatbread) and the paratha (the darker colored wheat flatbread) in the picture above. We enjoy using the bread to scoop up rice and take bites of both together.

Traditionally, pulau would be only one part of the meal. In addition to this, some of the other foods one might serve include some Indian pickles, raita (cucumber and yogurt mixture) or some vegetables cooked with some spices and served on the side. I also love to have a mixed greens salad with this dish for some added nutrition.


Friday, May 20, 2011

Quick Corned Beef , Cabbage and Potato Soup


Cooking with kids- for me, two words= stressful and stretching. However, I realize it is necessary for them to learn skills in the kitchen and it will also help them learn to try foods more readily if they are participants in the preparation and cooking process. So this is our latest family cooking activity retold for your entertainment.

This recipe was truly a work of the entire family! Even my husband got involved and offered some suggestions, which he rarely does. Anyways, my 9 year old son decided in the afternoon that he was going to treat me to a "gourmet soup". He has taken quite an interest in making food (mostly soups) since I started this blog. However, usually he starts chopping some carrots and celery and then wants to abandon ship for something else that has caught his attention. He decided previously that he is not going to be cutting up onions again anytime soon-- after he made a couple slices in one and immediately developed watery eyes and could not find any goggles to cover his eyes adequately. So with this in mind and the fact that I have been quite ill with a severe sinus infection and sore throat for quite some time, I really did not feel like going through this process again with him right now.

Suffice it to say, he went ahead and pulled out some carrots and started cleaning and chopping them while I was trying to rest. Later he came to me and told me of his progress and informed me that he could not find  anything else to put in the soup. By the time my husband came home from work, our son was again thinking about what he could use- putting lettuce in the soup was vetoed. As I looked through the fridge and saw we had some cabbage, my husband offered the idea that a cabbage and potato soup with carrots would be good. So as I tried to convince my son that this would be a good direction to go in with the soup, he pulled out some corned beef luncheon meat that I had picked up at the discount grocery the previous week. So we all were able to brainstorm and come up with things to pull together a tasty soup, and were we ever surprised at how good this soup turned out!!


Our son was so thrilled at being able to "make" the soup (admittedly with a little help from mom), and our 4 year old daughter was happy she was able to help chop up some of the vegetables.  While I am a bit of a control-freak and nit-picky about messes in the kitchen, it is a good feeling to be able to make something with one's children and see everyone enjoy the fruits of the group's efforts.


Ingredients:

1 large onion, chopped
4-5 medium-large potatoes, chopped
1 cup carrots, peeled (if needed) and chopped
2-3 celery stalks, chopped (we did not have them for this recipe)
1/4 medium head of cabbage, sliced or small chunks
10 oz. sliced corned beef, cut into pieces
8 cups water
4 chicken bouillon cubes
3 beef bouillon cubes
1 palmful of  Herbes de Provence
1 tsp ground nutmeg
2 tsp seasoned salt (I use adobo with pepper or cumin), or to taste
fresh parsley or cilantro, chopped for garnish if desired

Combine all the prepared ingredients into a large soup pot and add the water, bouillon cubes and seasonings. Bring to a boil and then simmer for about 30-40 minutes or until the vegetables are cooked and soft. Serve with some buttered toast, garlic bread or other type of bread.

Note: Herbes de Provence is a mixture of herbs that you can find in most any grocery store. I just purchased some from Penzey's herbs online. It is a wonderful blend of rosemary, thyme, fennel, basil, lavender, oregano, savory, marjoram and some include sage, chervil, dill and tarragon. The Penzey's brand seems to contain the largest variety of spices I have seen together. This is a wonderful blend for using in many dishes and is well worth keeping on hand. It goes wonderful with eggs, potatoes, chicken, vegetables, fish, stews or soups, as I found with this experiment.

Enjoy!!

Sunday, May 15, 2011

Banana Nut Cake


I love just about anything with bananas. Bananas are a powerhouse of vitamins and health benefits, including protecting us from heart disease, keeping bones strong, helping our eyesight, may help protect our kidneys, aid in digestion/elimination/prevention of ulcers, and the list just keeps going on. So I am loving the fact that I can eat this moist and yummy banana cake and feel good about it. I cut back on some of the sugar, which works fine especially if you use very ripe bananas. ....and the nuts, that is a whole 'nother topic of health benefits. The last time I made this recipe, I added a couple spices and ate it without any icing- it was perfect just the way it was.

Ingredients:

1/2 cup oil (I use olive oil)
2 cups flour (I also used part wheat & part white flour)
1 cup brown sugar
1/2 cup granulated sugar
3 bananas, mashed (about 3/4 cup- I sometimes use up to 1 cup and just bake a little longer, if needed)
3 large eggs
1 tsp baking soda
1 tsp baking powder
1/2 tsp salt
2/3 c. nuts
3/4 cup buttermilk
1/2 tsp cinnamon (optional)
1 tsp ground cardamom (optional)
2 1/2 tsp vanilla (optional)

Cream oil and eggs with sugar in a large bowl. Add in mashed bananas, vanilla and buttermilk. Sift together the dry ingredients and then add into the wet ingredients. Mix together well and pour into a greased and floured 9x13 inch cake pan (or use the nifty Baker's Joy nonstick spray mixed with flour from the can).

Bake at 375 degrees for 30-40 minutes or just until toothpick or sharp knife inserted in center comes out clean.

Eat it as is after it has cooled, or sprinkle with powdered sugar or whipped cream before serving, or it is also great with a cream cheese frosting.

This recipe could be made into a layer cake with icing if you cut the 9x13 inch cake in half down the middle. Then put a thin layer of icing between the 2 halves, set the other half on top and then put icing all over the cake. It makes a tall square layered cake.

This cake stays very moist for a long time and the flavor improves with time.

Monday, May 9, 2011

Fried Egg Sandwich


Did I mention before how much I love eggs? We love them so much at our house, with the exception of my 4 year old daughter. She informed me the other day when I was trying to get her to eat some- "Mommy, I just don't lub eggs." (Everything about her is either loved or not loved, no in-betweens!) Well, I will keep working on her until she joins the rank of egg-lovers in our home.

Meanwhile, I have also been having a dilemma regarding my camera. You see, I lost it right before Easter- just before we left to visit family out of town, along with a few lovely photos I was hoping to share with everyone. The camera still has not surfaced, and I am anxiously awaiting a new camera's arrival and hope to put it to use immediately. In the meantime, I am trying to use our original digital camera from years ago. Bear with this less-than perfect picture, but I just wanted to share one of my husband's and my favorite egg sandwich, which we use as a quick breakfast, lunch or even supper if I don't feel like making much. I grew up eating these prepared by my mom for breakfast or brunch. It has a few unusual ingredients, which you can leave out if you are not inclined to try them. However, when my husband first tried this, he was pleasantly surprised at how well the flavors went together.

Ingredients:

eggs- 1 or 2 per person
bread or rolls
mayonnaise or salad dressing
ketchup
dill pickle slices
lettuce
cheese of choice
sliced onion

Fry eggs in skillet- I usually make them with the yolk still runny and pop it so the juice comes out. This keeps the sandwich from being so runny. However, make them any way you like the eggs. After the egg is cooked, remove skillet from heat and lay a slice of cheese over the 1 or 2 eggs for each individual sandwich. Cover with a lid to melt the cheese. Meanwhile, start the bread toasting, and prepare the other sandwich ingredients. After the bread is lightly toasted, spread with some mayonnaise or dressing, a little ketchup (or more if you like), and layer the other ingredients on the bread. Remove the egg/cheese and place on the sandwich. Finish the sandwich by covering with the other part or slice of the bread. Cut in half, if desired, and then it is ready to serve.

How do you eat your egg sandwich?

Thursday, April 14, 2011

More Awards!


Well, earlier this month one of my favorite bloggers sent some more awards my way. She is really too kind. Since I have been gearing up for and finally getting back into a more regular part time work schedule, as well as trying to keep up with the family and all the work that goes along with that, I have not had as much time to blog about food. I appreciate Tina's interest and encouragement in keeping me going. Be sure to head on over to check out her lovely and very well-done blog, Pinay Cooking Corner In Texas- all about Filipino (Pinay) cooking with some interesting cultural information and stories thrown in.

So I am passing this on to 15 bloggers who I think are worth reading. If there are some repeats from my past award baton-pass, then that is because I feel they continue to do an amazing job and deserve more awards again.


Enjoy checking out these lovely blogs and be sure to post a comment of one (or more) of their posts, including maybe even follow them, if you feel inclined. 

Meanwhile, I'll be cooking up some great food from these talented bloggers-- oh, and trying to catch up on the never-ending pile of laundry! ;)