Showing posts with label snack. Show all posts

Sunday, August 24, 2014

Zucchini Pineapple Bread with Pineapple Glaze


Here is yet another favorite zucchini recipe. I grew up eating (and still love) spiced zucchini bread with pineapple and sometimes raisins or dates in it, but I love the simplicity of this recipe. It is so moist, like most other zucchini recipes, but the pineapple really shines through in this sweet bread. The pineapple glaze also adds another pop of pineapple flavor that is just perfect! This bread is best a day or two after being baked (if you can keep it hidden that long)- store in a plastic bag and then glaze it an hour or more before serving, allowing the glaze to dry some and not be so sticky. The other thing I love about this recipe is that it makes 2 loaves- and you will find that both are eaten so quickly that you will be glad you made 2 loaves since nobody is going to stop at one slice! 

Makes 2 loaves - about 20 servings
Ingredients:
  • 4 eggs
  • 1 3/4 cups sugar
  • 2 tsp vanilla
  • 1 cup oil (coconut oil is great)
  • 3 cups flour (I used ½ white wheat flour and ½ all purpose flour)
  • 1 tsp baking powder
  • 3/4 tsp baking soda
  • 1 15 oz. can of crushed pineapple, juice drained and reserved
  • ¾ - 1 cup chopped walnuts
  • 2 cups shredded zucchini (I peeled mine)- seeds also removed if large
  • ¾ cup confectioner's sugar, sifted
  • 2 Tbsp pineapple juice


Directions:
  • Preheat oven to 350 deg F. Grease and flour 2 bread loaf pans; set aside.
  • In a medium bowl, sift together dry ingredients. 
  • In a large bowl, whisk together eggs, sugar, vanilla and oil- or use mixer on low until combined, then increase to medium speed for 1 minute.
  • Add in pineapple, zucchini and nuts and mix together until completely combined.
  • Gradually add in dry ingredients.
  • Divide half of batter between the 2 prepared bread loaf pans. Drop pan on hard surface a few times to even out the batter and help bubbles come to the top. 
  • Bake in preheated oven for 55-60 minutes or until toothpick inserted in center of bread comes out clean. 
  • Cool breads in pans on cooling racks for about 10 minutes, then carefully turn out onto cooling rack to finish cooling.
  • To prepare the glaze, sift the powdered sugar into a medium bowl. Add in reserved pineapple juice, adding the juice gradually, 1 tablespoon first and then 1 teaspoon at a time. If you want the glaze firmer to stay on top of the bread more, do not add as much liquid. Combine well and pour part of glaze over top of the cooled loaves and wait about 10 minutes for the glaze to thicken some. After glaze has dried a little on the bread, add any remaining glaze to add another layer, also scooping up any glaze that has drizzled down over the sides. This will be thicker and can be spread over top of the loaves again. Let loaves set until glaze is not sticky wet. Slice and serve or store in a covered container (if putting in a bag or covering with plastic wrap, the glaze will soften and stick to the plastic). I wait to apply the glaze until before serving as it becomes very wet and sticky in the bag/storage container.
*If you desire to make it a piƱa colada sweet bread- add ½- ¾ cup of sweetened shredded coconut into your batter with the shredded zucchini, but the coconut will make the loaf a little more dry. So adding a couple Tbsp's of pineapple juice may help the loaf still be moist. Otherwise, remove the loaf from the oven immediately- may be finished sooner.


**This bread is wonderful frozen and later thawed, glazed and served.


Friday, February 7, 2014

Scottish Raisin Bread


This bread and recipe was given to us recently from my mom and has become one of my husband's favorites. Sometime in the past few months, I discovered the idea to toast sweet bread and add a little butter (I know, I'm probably a little slow!). Well, this bread is a perfect candidate and is just the thing for a snack or with a cup of tea (insert favorite hot beverage).  When I toasted this bread, I let it go a little longer because it is so dense and I wanted it a little crispy. Was it ever good! The toasting really brings out the sweetness of the raisins and adds more flavor to the nuts and oats. You could also add some jam or other toppings, but I don't feel it needs anything else.

I have not found a recipe quite like this before and was excited to share it here. The only place I was able to find a somewhat similar recipe was over at Always In The Kitchen. As the author of that site noted, this recipe may not be Scottish- but it sounds nice, and Scotland brings to mind oats and raisins (or currants), right? My recipe has much more oats and a little more sugar (still is not very sweet)- but these recipes do not have any oil. For a stronger molasses flavor, I used about 1/2 black strap molasses. So put your spin on it and give it a try! (By the way, if you don't have a toaster oven, be very careful trying to toast sweet breads in a regular toaster without some type of a sleeve for toasting as the slice will probably fall apart and you will be burned trying to remove it.)

Makes 2 loaves

Ingredients:

  • 2 eggs
  • 1 cup brown sugar
  • 2 1/3 cups buttermilk or soured milk
  • 2/3 cup molasses
  • 3 cups flour
  • 1 tsp salt
  • 1 tsp baking powder
  • 2 tsp baking soda
  • 1 1/2 cups rolled oats (I used quick oats and it was fine)
  • 1/2 cup chopped nuts
  • 1 1/2 cups raisins, dried currants or craisins, or a mix
Directions:
  • Preheat oven to 350 degrees F- (25 degrees lower if using glass baking pans).
  • Mix eggs with sugar in a large mixing bowl, then add in the milk and molasses.
  • Sift the dry ingredients together and add into the wet mixture.
  • After mixture starts to come together, add in the nuts and dried fruit.
  • Divide the batter between 2 greased loaf pans.
  • Bake for approximately 1 hour or until toothpick inserted in center comes out dry- start checking around 50 minutes if top of bread appears less moist

*My mom told me, after I originally posted this recipe, that she got it from What's Cooking At Myrtle cookbook by Levia Lerch. I increased the liquids since the bread seemed too dry. If you find it takes too long to finish baking, you can decrease the liquid to 2 cups buttermilk.


Thursday, February 21, 2013

How To Perk Up Jarred Salsa


While I have written before about how I love fresh salsa and there is nothing that can beat its flavor, I also know that fresh salsa is quite expensive to buy and even make any time of year, especially in the winter when so many of the items are not in season. So I LOVE shopping at Aldi's for fresh produce because it is so much cheaper. I can find grape tomatoes and avocados, among other things, at about half the sale price at other stores. Jarred salsa makes a great snack and is much cheaper but really needs a little something more to enhance it. I love avocados, but not alone, and they are a great super-food. So one of our favorite ways to eat them is chopped in salsa. Also, I am a great fan of cilantro and it is affordable any time of the year. Lately, we have been hooked on this recipe and I thought I would share it with everyone here. Here's to spring and getting a salsa garden going!

Ingredients:

  • 2 cups of salsa
  • 1 15 oz. can of corn, drained or 2 cups of fresh/frozen cooked corn, drained
  • 1 15 oz. can of black beans, drained or 2 cups of cooked black beans
  • 2 avocados, cut into small chunks
  • cilantro, chopped (according to taste)
  • lime juice (according to taste), may substitute lemon in a pinch
  • 1 small- medium chopped red onion, or whatever type you have on hand
  • Handful or more of grape tomatoes, quartered

Directions:

  • Combine all ingredients together and allow flavors to combine for a couple hours- although I found this quite addicting when I was tasting during preparation!


Wednesday, February 13, 2013

Plain Muffins


This is another one of the nice little foods we had at our cooking club tea party recently. One of the members shared her family's old recipe that she remembers being served at her aunt's home many times when she was young. This is a simple muffin (I was struck by the idea of a plain muffin when she shared them with us at first!) but is wonderful with jam or lemon curd as we had them at the tea party. They are not very sweet- just a hint of sweetness. Since they are easy to make, they are great to make for something different for a snack or tea-time.

Makes 1 dozen regular sized or 36-48 mini muffins (depending on amount used)
Ingredients:
  • 2 cups flour
  • 3 tsp baking powder
  • 1 tsp salt
  • 4 Tbsp sugar
  • 1 egg
  • 1 cup milk
  • 4 Tbsp melted butter, shortening or oil
  • optional: 1 tsp vanilla 
  • optional: confectioner's sugar for dusting
Directions:
  • Preheat oven to 375 degrees.
  • In a medium bowl, beat egg slightly and add milk and fat, as well as vanilla if using.
  • Sift together dry ingredients and then add into the liquids.
  • Beat about 1/2 minute just until all the flour is mixed throughout the batter.
  • Prepare greased muffin tins and fill half full. Bake at 375 degrees about 15-20 minutes for regular sized muffins or 8-12 minutes for mini muffins (start checking about 3-5 minutes before time ends in case your oven temperature varies.) They should be light golden brown. 
  • Cool in pan for about 5 minutes and then remove to wire racks to cool longer.
  • May be served warm or cool with jam or other toppings. Dust the tops with confectioner's sugar, if desired.

Monday, February 11, 2013

Blueberry Scones... a tea party... and reminiscing about Victoria magazine


Our cooking club had a wonderful tea party at my house the other evening. This was our first one together, and the table was overflowing with the massive array of treats. Since having this tea,  I read If Teacups Could Talk by Emilie Barnes and was so inspired to take moments with my family and friends to celebrate life and relationships in this way.

Somehow, in the midst of this, I was taken back to my late teens and early adult years when I spent hours poring over the "Victoria" magazines that came every month. This was truly something that shaped my tastes for clothing and decorating, although I would not say that I really decorate or dress in that style today. However, there were timeless and classic qualities about much of the clothing, decor and furniture. There is something pretty and restful about the magazine and the way it encouraged people to have a place of beauty to relax in either alone or with others. I would also dream of traveling someday to many of the beautiful places across the countrysides of England and France, among others, that were featured in those pages. It is funny that in the intervening years, getting married, moving away from my hometown and later stopping the subscription because I was overrun by magazines and needing to save some money, I still could not bring myself to throw out or give away the old copies. They were always so wonderful and enjoyable to reread. Right now, they are sitting in boxes in the garage, and all these last 5 years, I kept trying to get up the nerve to de-clutter and get rid of them. Instead, I think I am going to put them on a shelf in my soon-to-be organized office so they will be more easily accessible for relaxation and inspiration.

So, enough with my memories. I want to share my latest scone recipe that I made for our tea party and have been really enjoying. I loved them when they were fresh, but they are also very good days later. Just keep them stored in an air tight container in the fridge and then toast them when you want to have some. The outside becomes just slightly crispy like they just came out of the oven and the inside stays moist, tender and so flavorful. This is my new favorite snack or breakfast with tea or coffee after my youngsters are fed and I have a few minutes to sit and relax.

Serving: 16 mini scones or 8 regular sized
Ingredients:
  • 1 cup fresh or frozen blueberries
  • 3-4 Tbsp sugar, divided
  • 2 cups all purpose flour
  • 2 tsp baking powder
  • 1/4 tsp salt
  • 6 Tbsp butter, cubed
  • 2/3- 3/4 cup heavy cream
  • 2 eggs
  • 1 tsp vanilla extract
  • 1/4 tsp lemon peel
  • coarse (decorator) sugar for sprinkling on top
Directions:
  • Preheat oven to 400 degrees.
  • Lightly grease cookie sheet, or may use a smaller rectangle baking dish
  • Sprinkle fruit with 1 Tbsp of sugar and set aside.
  • In a medium bowl, combine the flour, salt, baking powder, and remaining 3 Tbsp of sugar. 
  • Cut in the butter with a pastry blender or a fork (or just your fingers!) until chunks are very small pea-sized.
  • Whisk together the cream, 1 egg, vanilla extract and lemon peel and then add into the dry mixture. 
  • Stir until the wet and dry ingredients begin to come together.  If there is a lot of flour left in the bottom of the bowl, add a couple Tbsp of cream to the bowl and mix it all together. 
  • Then turn the dough out onto a lightly floured surface and lightly knead the dough a few times just until it holds together and some of the extra flour from the bowl has been incorporated in.
  • Press or roll out into a rectangle or press into the rectangle pan if using one. Divide into 4 equal sections, pressing straight down with a sharp knife. Then cut diagonally across each section, pressing straight down.
  • Lightly beat the remaining egg and brush over top of the scones. 
  • Sprinkle with the coarse sugar.
  • Bake 12-15 minutes just until the outside is golden brown.
  • Cool on a wire rack for about 5 minutes-- wonderful served warm with lemon curd.
Parts of this recipe was inspired by Lady Behind The Curtain's scones.
This was shared on the following:
I Should Be Mopping The Floor party #55

Saturday, December 17, 2011

South African Krunchies


This recipe came to me by way of some missionary friends to South Africa this past summer. Lindsey shared how she developed this recipe after enjoying them at local coffee shops. These are a popular type of sweet treat with each shop making their own versions. I have posted Lindsey's recipe, along with a couple additions of my own. When I made these, I was amazed at how good the flavors were and found myself going back for "just another bite". Since these contain oats, they are higher in fiber. Even though the original recipe was very good, I added walnuts and dried cranberries, which also add more antioxidants, vitamins and minerals. I can see where these bars would be a wonderful base for all types of add-ins.

Ingredients:


225 gm butter or margarine (or approx. 1 cup), may also use coconut oil
1 Tbsp golden syrup (pancake syrup) - I used King Syrup
1 tsp baking soda
1/2 tsp vanilla extract
1 cap-ful almond essence/extract- I used about 1 tsp
     Melt butter in microwave; stir in syrup (heat more if needed until syrup blends in). Add soda as well as vanilla and almond essence.


1 cup sugar
1 heaping cup flour
2 cups oats (I used quick oats)
1 cup coconut (I used unsweetened shredded coconut)
1/2 tsp salt
     Mix dry ingredients together. Then stir in the following:
1/4 cup chopped nuts (walnuts, almonds, pecans, etc), optional
1/2 cup or more dried cranberries- or may use other dried fruits instead, optional


Press into a 9x13 inch ungreased baking dish (I lined my pan with aluminum foil and lightly sprayed with nonstick spray). Bake at 350 degrees for 15 minutes.  Cool completely on wire rack and then may cut into bars. If desired, may use a simple confectioner's sugar and milk glaze drizzled over top. Store bars in an airtight container.


Serves approximately 15 larger bars or more depending if cut smaller.


Pin It

Thursday, March 24, 2011

Peanut Butter Oatmeal Bars/Cookies


I love peanut butter cookies but am often looking for more ways to make things a little more healthy, including adding more fiber and cutting back on the sugar and hydrogenated oils. Recently, while shopping at one of my favorite bargain food shops, I came across a whole bunch of natural chunky peanut butter. Of course, I just cannot pass up a deal like this-- 99 cents for a jar of peanut butter!!! Since I have a strange son who has a thing for textures in his food and does not like nuts in things and my husband does not particularly like chunky peanut butter, I rarely buy it. However, I had a brainstorm a while back (another time I found some reduced chunky peanut butter on clearance) that I could use chunky peanut butter in cookies and baking and not need to add the chopped nuts separately. So remembering this, I bought a flat of the chunky peanut butter- full of plans about how to use it up. Well, it has been a little while, and I got a little sidetracked with other things. The other day, I saw all that peanut butter sitting begging to be used, and I decided I needed to get on the stick! Now, if any of you have used natural peanut butter to bake with, you know it does not give quite the same flavor and texture to things that the stuff with all that hydrogenated oil gives, but it is still good. Since I have been eating natural peanut butter all my life, I really do not miss the difference.

I made this recipe from the Bake It Better With Quaker Oats cookbook, which is full of winner recipes using oats. The recipe name was "Peanutty Crisscrosses". Because I really do not enjoy making cookies when I am pushed for time (which is most of the time), I often opt to make bar cookies. So I adapted the recipe into a bar cookie- I will give both instructions for those who enjoy slaving over those cookie sheets.

Ingredients:

3/4 cups butter (1 1/2 sticks), softened
1 cup peanut butter- I used chunky
1 1/2 cups firmly packed brown sugar (I cut back the sugar to 1 cup- still good)
1/3 cup water
1 egg
1 tsp vanilla
3 cups oats (quick or old-fashioned, uncooked-- I used quick oats)
1 1/2 cups all purpose flour
1/2 tsp baking soda
1 cup chocolate chips, mini chocolate chips, vanilla chips, butterscotch chips or peanut butter chips (or a combination of these- I used about 1/4 cup vanilla chips and about 1/2- 3/4 cup mini chocolate chips)- optional if making formed cookies
granulated sugar if making into formed cookies

Beat together the butter, peanut butter and sugar until creamy.  Add water, egg and vanilla; beat well. (I sifted the flour and baking soda together to make sure there were no lumps of baking soda not mixed in.) Add combined oats, flour and baking soda; mix well. Mix in the flavored chips, if desired.

If making into bar cookies, prepare a 9x13 inch pan either sprayed with nonstick spray or lined with foil and sprayed with nonstick spray. Spread out batter evenly in pan and bake in the oven at 350 degrees for approximately 25-35 minutes, taking them out before they seem completely firm or they will be too dry. If you are using a glass dish, lower the baking temperature by 25 degrees. Cool on a wire rack completely. Then you may drizzle them with a little glaze made from confectioners sugar and milk- put it in a sandwich bag with one corner removed (very small hole) and gently squeeze the bag back and forth over top of the bars. Cut and serve. Store in a tightly covered container. If you mistakenly overbake them, you can store them in a sealed container for a couple days with a slice or two of bread to soften them up.

To make them into cookies, cover the bowl of cookie dough and chill for about 1 hour. Then heat your oven to 350 degrees and shape dough into 1 inch balls. Place on ungreased cookie sheet; flatten with tines of fork dipped in granulated sugar to make a crisscross pattern. Bake 9-10 minutes or until edges are golden brown. Cool 2 minutes on cookie sheet; remove to wire rack. Cool completely. Store in tightly covered container. Makes about 7 dozen.


Tip Junkie handmade projects

Tuesday, February 1, 2011

Chinese Pot Stickers/ Dumplings


In this post, I have tried to share some of the things I have learned in making Chinese Dumplings/ Pot Stickers. 


This is the finished product- smelled so good and tasted so good just by themselves- I had a hard time getting pictures!


I have been trying these Chinese dumplings or pot stickers for a few days now- doing different things with the recipes for the filling and the dough. While they are not really that hard, they take some time to assemble. It is something that is probably best done in a large batch and then freeze some for later. Then you don't have to go through all the work of making them later- just pull out of the freezer and continue with the cooking process. Plus, you can make a whole lot of these very cheaply and enjoy anytime at home with some fried rice, spring rolls or whatever else you might like. 

Also, the proper folding of the discs requires practice. As you will see, I'm still practicing. ;)  Anyways, I have found a couple good sites on food blogs that give some great photos and step-by-step instructions, as well as recipes for these. My two favorite are  http://lizzieeatslondon.blogspot.com/2008/03/tester.html  and  http://appetiteforchina.com/recipes/guide-wrapping-and-pan-frying-dumplings . Check them out if you plan to make these, as it is very helpful in the folding and cooking process. I have deviated a little in some of my filling ingredients and used a dough recipe I have worked with through trial and error (very simple). However,  I am planning to try using some pot sticker dough (Jiaozi) or maybe even try the wonton wrappers next time I go to the store. The dumplings can be boiled/steamed (I prefer steaming them rather than boiling), and if you like a little extra flavor, try making them into pot stickers and frying them in a little oil. I used a process of combined steaming/frying in one pan. Check out my pictures and recipe- meanwhile, practice never tasted so good!


This is my meat filling- so flavorful!


These are the pot stickers just out of the frying pan and cooling a little on paper towels.


Is your mouth watering yet? Well, here is my recipe and some explanations of how the process went.


Ingredients:

Dumpling Dough:

4 1/2- 5 cups all-purpose flour
2 2/3 cup water
1/4 tsp salt

Mix 4 1/2 cups flour with the salt and the entire amount of water. Stir well and mix in the remaining flour, if able. If it is getting too hard to stir, put out on a floured surface and knead in the remaining flour amounts. You may even need a little extra flour- you want to have a dough that is not sticky. After you have kneaded it to the desired consistency, then let it rest, covered, for approximately 30 minutes. Meanwhile, start making your meat filling.

Meat Filling:
1 pound ground pork
1- 1 1/2 tsp salt  (I used Goya Adobo seasoned salt with cumin)
1/4 cup chopped green onions
2-3 tsp grated ginger (see my hint at the bottom)
2 Tbsp chopped fresh parsley (I used some I had chopped up and frozen earlier)
1/8 tsp five-spice powder (optional)
1 Tbsp soy sauce
1 Tbsp corn flour (I used 2 tsp flour and 1 tsp cornmeal)
1/4-1/3 cup water

Assemble your ingredients and mix all the ingredients well, adding only 1/4 cup water initially. The pork should become a pasty "mess"- so add more water if needed to get a smooth consistency.

When the dough has rested, roll out into a rope on a floured surface. Cut the rope into equal pieces- approximately 50. Keep these floured so they do not stick together. Have a small bowl of water handy to moisten the sides of the dough. Then take the dough pieces and roll out into a circle approximately 6 inches in diameter. Put a teaspoonful of filling in the center of the dough circle and moisten the edges with a little water. Then take one side of the circle and start pleating it around about halfway. Then fold up the other edge to cover the meat and press into the side with the pleats. If necessary, moisten the edges to keep them together. It does get a little tricky to moisten the edges and not have the dough edges turn gooey and stick to your fingers- so don't use too much water.  After you have made a dumpling, put it on a well-floured plate and continue making them. You can make some, fry them and then assemble more- doing the various parts in shifts.

To cook, place in a non-stick saucepan with enough boiling water to come up about 1 inch. I also added about 2 Tbsp (more or less) of oil into the boiling water. This way, I don't have to worry about them burning before I get the oil in. So I covered the pan of dumplings in the water/oil mixture and boil/steamed them for about 7-8 minutes. Then I uncovered the pan and continued cooking to evaporate the remainder of the water. (If the water went down too much before the initial cooking time was finished, then I added a little more to the pan.) As the water evaporated, the oil was there to assist in the frying and I just kept turning  them as they browned. The oil splattered quite a lot- if you don't have a screen to use, you might want to cover the pot and vent it a little so your kitchen is not covered in oil. When you have browned them enough- drain on paper towels and then enjoy!

If you use the premade dumpling discs, then you can skip the most tedious part (in my opinion). These can be enjoyed with your favorite chinese sauce- sweet or savory.  You also can eat them after they have boiled (skip adding the oil to the water) for a healthier/lowfat alternative- but not as tasty, in my opinion.

*Hint for fresh ginger- it is pretty much readily available in a larger grocery store in the produce section and a little goes a long ways. I learned from Rachel Ray that you can take fresh ginger and store it in the freezer and take it out when you need it. I have bought a lot when it was on sale or marked down and put it in a ziplock bag and frozen it. When I need some fresh ginger, I remove it, gnaw off a chunk with a knife (it might be easier to use if you cut it into pieces prior to freezing) and then peel it. It is then ready to slice, chop or grate for a recipe. It is such a great flavor, better for certain recipes than the dry ground ginger.


Pot Stickers on FoodistaPot Stickers

Wednesday, January 26, 2011

Sticky Buns (Ć  la monkey bread style)


This really is more of a monkey bread recipe- but it was called sticky buns on the recipe I was given. When you are looking for a sweet, soft and doughy treat for a brunch, tea, dessert or just about anytime-- look no further. This takes a little planning to have the bread dough ready, but it is not hard to put together. This recipe was given to me by a friend, Rick Koppenhaver, and I am not really sure where it originated from. However, we have enjoyed it so much every time we make it. It has an unusual ingredient- vanilla pudding. In the picture above, I got more creative and added some unsweetened shredded coconut when the nuts were added the first time. It really give a nice crunch/texture but not an overpowering coconut flavor.

Ingredients:

2 loaves of frozen bread dough, defrosted overnight in the refrigerator (or you may use your favorite bread dough recipe- 2 loaves worth)
1 1/2 stick of butter or non-hydrogenated margarine
2 Tbsp milk
1 1/2 cup brown sugar
1 3-4 oz package of vanilla pudding mix (that needs to be cooked- not the instant)
11/2 tsp cinnamon
walnuts, pecan or other nuts (optional)
coconut to taste (optional)

Grease a 13x9 inch baking pan. Break apart 1 loaf of bread into balls the size slightly smaller than golf balls and place balls/wads of it in the bottom of the pan. (There should be open areas between the balls of dough.)  Melt the butter and add the milk, sugar, pudding mix and cinnamon, stirring together well. Pour 1/2 -3/4 of this mixture over the bread already in the pan- to cover the dough and run around it somewhat. If desired, drop some whole or chopped nuts, followed by the coconut, around the pan also. Break apart the second loaf of bread dough and place in the empty spots. Pour the remainder of the liquid mixture over top of the second dough additions and sprinkle with more nuts, if desired. Cover loosely with plastic wrap or wax paper sprayed with non-stick spray (to keep it from sticking as it rises). Let rise for 3-4 hours or until it has filled the pan and risen to the top or slightly higher than the top of the pan. Bake in a 350 degree oven for 20-30 minutes or just until they are lightly brown- watch them closely to make sure they do not get too dark (they will end up hard and dry). Allow to cool a few minutes before serving, but they are best served while still warm. They will have a lot of gooeyness on the bottom, so it is good to serve them top-down on the plate with the gooey bottom facing up.  Watch out- they are addicting!

These are also still good if kept covered (to keep them from drying out) after baking/serving and then reheated later in the microwave for about 6-12 seconds in the microwave, depending on the strength of your oven.

Enjoy!

Monday, January 24, 2011

Vanishing Oatmeal Raisin Cookies

Oatmeal Raisin Cookies (rear)
Oatmeal Craisin and White Chip Cookies (middle row)

These are the best oatmeal cookies- at least a huge favorite in our family, and the recipe came originally from Quaker Oats. I have been making them for years, and they are always a huge hit. You should take them out of the oven before they seem completely done, or they are not chewy and soft. I like to think of these as a "healthy" cookie with the oatmeal and raisins. You can also try different additions such as craisins (dried cranberries) and white baking chips (some call them vanilla or white chocolate chips)

Ingredients:


1 cup (2 sticks) butter, softened, or non-hydrogenated margarine (be careful it is recommended for baking)
1 cup firmly packed brown sugar
1/2 cup granulated sugar (or xylitol or other granulated sweetener)
2 eggs
1 tsp vanilla
1 1/2 cups all-purpose flour (or white whole wheat flour)
1 tsp baking soda
1 tsp ground cinnamon (I actually prefer apple pie spice mixture- is a mixture of cinnamon, nutmeg, allspice, or add in an additional 1/2 tsp allspice)
1/2 tsp salt (optional, I usually cut back since I use salted butter)
3 cups quick oats (may also use old-fashioned oats)
1 cup raisins
1/2 or 3/4 cup chopped walnuts 

Preheat oven to 350 degrees. Beat butter and sugars until creamy. Add eggs and vanilla; beat well.  Combine flour, baking soda, spices and salt (I prefer to sift the baking soda with a little flour to make sure there are no lumps). Add to butter mixture, mixing well. Stir in oats and raisins and any other optional additions; mix well.

May chill the dough for 30 minutes, if desired, and then drop by rounded tablespoonfuls onto ungreased cookie sheet. Bake for 10-12 minutes or until light golden brown. Cool 1 minute on cookie sheet; remove to a wire rack. Cool completely. Store in an airtight container.

Makes about 4 dozen 2 1/2 inch cookies.


Sunday, January 9, 2011

Granola


My mom has made this ever since I can remember. It is so tasty, yet very healthy-- and much cheaper than store-bought cereals. This is also great as a topping on yogurt and ice cream, as well as using it for layering with fruit and yogurt for a parfait. There are so many ways to eat it.

Ingredients:

6 cups rolled oats
1 cup wheat germ
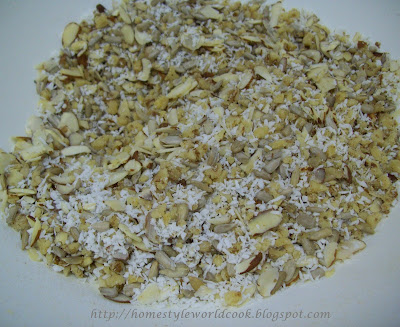
1/2 cup chopped walnuts
1/2 cup sliced almonds (or they can be coarsely chopped)
1/2 cup coconut (unsweetened)
1/2 cup sunflower seeds (may use more)
3/4 cup honey (may use 1 cup for a little more sweetness)
1/2 cup oil
1 1/2- 2 tsp vanilla (optional)
1-2 tsp cinnamon (optional)

Heat oats and wheat germ on a pan at 350 degrees for 10 minutes- careful not to burn.

Combine honey and oil; set aside. Combine all the other ingredients and add oats and wheat germ.

Pour honey and oil mixture over everything and mix thoroughly. Spread evenly in pan/or cookie sheet, careful to keep it thicker around the edges so it does not burn. Bake at 350 degrees for 20-25 minutes. Cool on a rack. (It is easier to remove later if you loosen it from pan right away when taking it out of the oven- can mound it up a little.)

Add and mix in raisins and/or dates or chopped apricots, if desired, after baking is complete, while it is still warm.

Store in a sealed container.