Showing posts with label condiments. Show all posts

Thursday, February 21, 2013

How To Perk Up Jarred Salsa


While I have written before about how I love fresh salsa and there is nothing that can beat its flavor, I also know that fresh salsa is quite expensive to buy and even make any time of year, especially in the winter when so many of the items are not in season. So I LOVE shopping at Aldi's for fresh produce because it is so much cheaper. I can find grape tomatoes and avocados, among other things, at about half the sale price at other stores. Jarred salsa makes a great snack and is much cheaper but really needs a little something more to enhance it. I love avocados, but not alone, and they are a great super-food. So one of our favorite ways to eat them is chopped in salsa. Also, I am a great fan of cilantro and it is affordable any time of the year. Lately, we have been hooked on this recipe and I thought I would share it with everyone here. Here's to spring and getting a salsa garden going!

Ingredients:

  • 2 cups of salsa
  • 1 15 oz. can of corn, drained or 2 cups of fresh/frozen cooked corn, drained
  • 1 15 oz. can of black beans, drained or 2 cups of cooked black beans
  • 2 avocados, cut into small chunks
  • cilantro, chopped (according to taste)
  • lime juice (according to taste), may substitute lemon in a pinch
  • 1 small- medium chopped red onion, or whatever type you have on hand
  • Handful or more of grape tomatoes, quartered

Directions:

  • Combine all ingredients together and allow flavors to combine for a couple hours- although I found this quite addicting when I was tasting during preparation!


Wednesday, November 21, 2012

Cranberry Salad/Relish


Cranberries are such a traditional part of a Thanksgiving dinner in the United States. However, because they are so tart, many people do not like them. When I was young, my family always had the jellied cranberry in a can with our turkey dinner. While I still enjoy that type of cranberry relish, I really have come to enjoy the whole cranberries. One of the grocery stores in our area sells a couple of different cranberry salads that are so yummy- but have a lot of high fructose corn syrup (HFCS). Since I have been trying to cut back on sugar and avoid HFCS as much as possible, I decided to make up my own version that has been inspired by their recipes. I have been making this for the past couple years, and wherever I serve this dish, it always gets rave reviews.

Don't be put off by the list of ingredients. It is not very hard to make if you have a food processor or chopper and is totally worth the effort. It also freezes well and can be made up in a big batch and then separated into a few containers to freeze. Then remove it later and serve with some chicken, turkey or pork.


Ingredients:

  • 1 bag (12 oz.) of cranberries, fresh or frozen- I prefer frozen so they don't mush up as much when chopping)
  • 1 large apple
  • 2 large celery stalks, outside fibers removed if necessary
  • 1 (15 oz.) can of pineapple, drained (reserve the liquid for jello)
  • 1 large orange, peeled and membranes removed or 1 (11 oz.) can of mandarin oranges in light syrup, drained
  • 2 (3 oz.) boxes of raspberry or cherry jello
  • 1 3/4 cup total of liquids- use reserved liquids and enough water or orange juice to make up the amount needed
  • 3-4 Tbsp sugar

Directions:
  • Rinse cranberries and chop with quick pulses in a food processor or chopper, being careful to not chop too much or it will turn to paste/liquid
  • Continue chopping the remainder of the fruit/vegetables and add everything into a large bowl. Oranges need to be broken up somewhat so there are not very large chunks.
  • In a medium saucepan, heat liquid and sugar together until just boiling, then add in the gelatin. Turn off  heat and remove from the burner, stirring well to mix and dissolve the jello. 
  • Add the liquid mixture into the chopped fruit and stir well. 
  • Cover the bowl and refrigerate for at least 4-6 hours or until well-chilled and more firm. 
  • Just before serving, stir to loosen it up and break up the chunks. 
*Note: if you desire a much softer consistency, try using only 1 box of jello and add in 1/4 -1/3 cup extra sugar into the liquid mixture when boiling. There will be more juices from the cranberries and other fruit.


Saturday, August 18, 2012

Zucchini Jam


This is a recipe that I have been dying to share for quite some time, but life has been a little too crazy to get it all together until now. My mom (who doesn't remember where this recipe came from) made this jam once or twice many years ago, and I have made it a few times since I married and started doing my own food preserving. I love how it is a great way to use up a pile of zucchini (especially those great big ones that inevitably seem to appear out of nowhere in the garden). I have noticed many cake recipes that hide and disguise zucchini, but I have not met anyone who has tried this before-- and it really has a nice flavor.  


For those of you who may wonder how on earth zucchini would taste in a sweet jam? Fear not! The zucchini is really just a subtle texture and is flavor-neutral. Therefore, you get the healthy benefits of eating zucchini but can enjoy it as a sweet topping. Actually, the predominant flavor is the pineapple and whatever flavor of jello you decide to use- I used peach jello flavor. *Note: if you use smaller zucchini, you may have a very solid and firm jam since larger zucchini have more water content. Also, for those people who are pretty picky, peeling the squash allows it to be disguised in the jam much better.

Yields: 5-6 half pints
Ingredients:

  • 6 cups of zucchini, seeds removed, grated (may be peeled, although I did not)
  • 4-6 cups sugar
  • 6 oz. box of jello or (2) 3 oz. boxes- apricot, peach, pineapple or orange
  • 1/2 cup lemon juice
  • 1 cup crushed pineapple, drained
Directions:

  • In a large pot, cook the zucchini on low-medium heat for 15 minutes, stirring often. No need to add additional water since the zucchini already has a high water content that seeps out as it cooks.
  • Add sugar and boil for 6 minutes more, stirring often.
  • Add lemon juice and pineapple and boil 6 minutes more, stirring often.
  • Reduce heat and add package of jello. Stir well and pour into prepared jars.
  • Cover with canning lids/rings and immediately invert jars for 20-30 minutes or process in water bath, if desired.


Shared with the following:
Weekend Potluck
Mop It Up Mondays

Thursday, December 29, 2011

Guacamole


Avacados are one of those foods that many people either like or dislike. I never really cared for them, and never even ate them until I was much older. That may explain why I have not been very fond of them in their unadulterated form. However, I have lately developed a taste for them in guacamole- if there are enough other ingredients and flavors present. This recipe is my version of guacamole as my husband and I have enjoyed it lately. Since avacados are so healthy for us- believed to be helpful in lowering cholesterol, full of the healthy fats our bodies need to function properly, great for heart health, may prevent cancers, high in fiber, as well as  high in lutein, which helps our eyes function properly- it makes sense to try to eat more of this fruit any way we can.

Ingredients:

2 large ripe avacados, pulp mashed
3-4 Tbsp lime juice (or lemon)
1/4 -1/2 cup plain Greek yogurt
3/4 cup chopped tomatoes (I used grape tomatoes)
1/2 cup chopped cilantro (may use dried cilantro, but is not as potent or flavorful)
1 1/2 tsp cumin powder
3/4 tsp salt (I used Adobo seasoned salt)
1/4 tsp ground black pepper
1/2 - 1 tsp green pepper sauce
1 medium red or sweet white onion, diced
1-2 cloves garlic, grated or put through a garlic press
(The above ingredients are only approximate amounts. You will need to taste and adjust them as desired.)


Mix all the above ingredients together and allow flavors to blend in the refrigerator for at least a few hours. Serve with corn chips or use with Mexican dishes.


Pin It

Friday, September 30, 2011

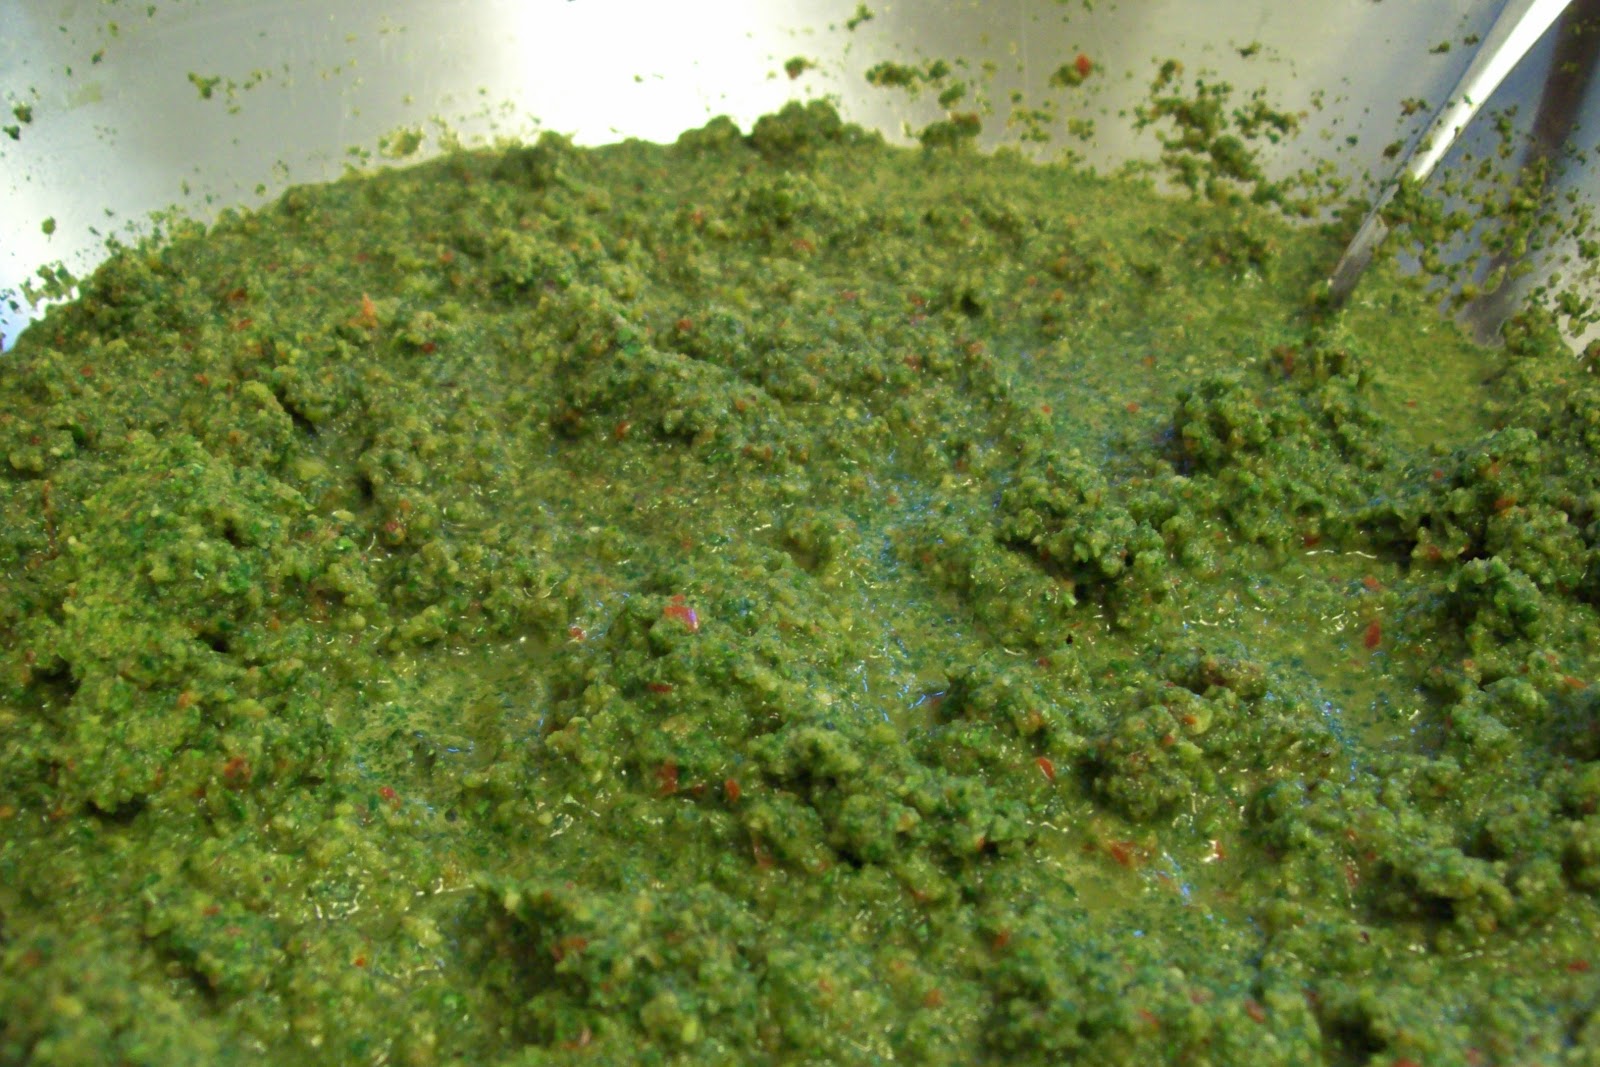
Sofrito


I finally was able to collect the ingredients and make this recipe. This is the "liquid gold" that I often cook with and recommend using in so many dishes to add exceptional flavor. I was introduced to it when my Puerto Rican friend taught me how to make Puerto Rican Rice and Beans (Arroz con Gandules). This mixture is really what provides so much flavor to many of the Puerto Rican and Dominican meals. While you might find it in jars on some of the grocery shelves, it has very little flavor and is a world of difference from the freshly made sofrito. Since it is much easier (and cheaper) to buy these items during the summer, it makes sense to make a big batch so you have enough to last through the winter. It keeps in the refrigerator for a long time and extra containers can be kept in the freezer for months (I had some that after a year was still good, but maybe not as strong).

This was a BIG batch!!

There are so many variations of this mixture but the commonality is the combination of green peppers, onions, garlic, cilantro and culantro (also known as recao, mexican coriander, long coriander, and the list of alternative names goes on). Many people also add a small pepper called aji dulce, which is usually found in hispanic markets. From here the variations continue with various herbs and seasonings. I have taken some recipes from a couple hispanic friends and made up my own. To make this, you need a good, strong blender or food processor. It also helps to have a helper or two to make the work go faster and enjoy some conversation!

When I was making this batch, I experienced a funny thing-- this huge batch of sofrito took most of the day for me to prepare all the ingredients and then blend them together. By the time I was part way through the blending process, I felt that the culantro (which has normally quite a strong smell) did not have much of any smell. Feeling frustrated with the fact that I was putting all this work into something that might not turn out very potent and we had bought PILES of this herb, I called my husband at work and told him to pickup some cilantro at the store on his way home. When he walked in the door and started helping me finish it up, he commented that it had a LOT of smell! So I ended up using all the culantro as well as the cilantro- just to be sure! Maybe my sense of smell was becoming immune to it after breathing it all for so long.

Suffice it to say, the amounts in this recipe are not exact and everyone uses a little different amounts of the various items. I have made sofrito previously and ended up with a more watery/bland sofrito. I later found out I used too many onions. So the watery vegetables are best used in smaller amounts so it does not water down the flavor of the spices. When this is finished and used in cooking, usually 1-3 Tbsp is enough for flavoring an average size dish. (I often use the heavier amount since I feel it adds a lot of flavor, but you have to go according to your tastes and how strong the sofrito is.)  I actually tripled this recipe and ended up with probably about a couple gallons of sofrito.

Ingredients:

* 4 green peppers, or part sweet red peppers
* 5 aji dulces (a small sweet pepper)
*  5 heads of garlic, peeled
*  2-3 large yellow or red onion
*  3 bunches of culantro/recao
*  1-2 bunches of cilantro (some people use the reverse ratio- 1-2 culantro bunches/3 bunches of cilantro)
*  olive oil
* small amount (small blister pack) of fresh oregano, stems removed (may use dried if fresh is unavailable)
* 1 stalk of celery
*  1/2-1 bunch of flat leaf Italian parsley
*  optionally 1/2-3/4 tsp Italian Herb blend, 1/2 tsp cumin

Directions:

After all the ingredients have been cleaned/prepared and large items chopped into chunks, begin by putting some peppers, onion, garlic and herbs in a blender or processor and gradually add in some olive oil until it will blend enough to make some juices. As it gets more wet and liquified, then you can add the other things. However, you will need to work the mixture, moving it around some with a spatula and loosening any pieces that may have become lodged around the blades. 

If the blender becomes too full, pour out about half and add in more chunks, you may need to put some of the liquid mixture back into the blender in order to get the new additions blending properly and not tax your blender too much. Usually, a good food processor will not have much problem with this, but blenders will burn out quickly if they are strained too much and may leave chunks of food at times. 

When it is finished, divide into smaller lidded container that will keep in the freezer and reserve some to keep in the refrigerator for use immediately. So people keep old ice cube trays to freeze it in and then put the blocks into plastic bags. Once you use some plastic to store the sofrito, it will be difficult to remove that smell from it later. So I keep some containers just for use with sofrito.


**Some of the specific uses might be (of course) Puerto Rican and Dominican style Rice and Beans, just bout any dish that uses ground beef, put it under the skin of poultry before roasting, chicken soup/broth for a little different flavor, and the list goes on.

Have fun experimenting!


Pin It

Monday, August 22, 2011

Freezer Pickles


This is the season for an abundance of cucumbers in my garden. We have been eating these with tomatoes so many meals, and I was looking for an easy pickle recipe that could use a lot of them at once without getting out the canner and heating up the kitchen. Unfortunately, the extreme heat during July adversely affected my pickle cucumbers, causing the plants to die out before I was able to get more than a few off the plant. I had tried a couple long cucumber varieties, but was disappointed to find that they would grow much larger around on one end, having a larger seed section. Anyways, since I have so many of these larger cucumbers, I decided to try using them in the pickle recipe.

My sister-in-law shared this recipe with me, and I did not see how they would have flavor and be crunchy. However, they turned out very well- crunchy with a nice slightly tangy/sweet flavor, resembling the bread and butter pickles. The onions look like they would still be raw but they have a crunch with the flavor of the pickle juice- nothing like a raw onion. In addition, I did not add in the green peppers but added some mustard seed to the mixture. After storing these in the refrigerator and stirring them everyday for 4 days, you can put them into freezer containers, or I have just kept some in the fridge and they are still great indefinitely. I also used a crinkle cutter blade and even removed some of the seeds on some of the larger cucumbers and simply cut them into some chunks.


Ingredients:


7 cups sliced cucumbers
1 cup onions, sliced (may use sweet or cooking onions)
1 cup green peppers, sliced (optional)
        
      Place the following ingredients in a large 4-5 quart bowl with a lid: 
1 cup white vinegar
2 cups sugar
1/2 Tbsp salt
1 Tbsp celery seed
1 Tbsp mustard seed (may use less, optional)
       Combine ingredients in a saucepan and bring to a boil. Boil about a minute or until the sugar has completely dissolved, stirring well. Cool it down somewhat. (The recipe says cool completely, but I poured it over while still warm.) Pour syrup over the cucumber mixture and stir around. (The cucumbers will be higher than the liquid.)  Put in the refrigerator.
     Once a day, remove from the refrigerator and stir cucumbers, bringing the cucumber slices on top to the bottom. You will note that the cucumbers will add to the liquid and eventually the liquid will cover the cucumber mixture. On the fourth or fifth day, you may put them in freezer containers and then freeze. When ready to eat them, remove from the freezer and allow to thaw before serving.


The challenge with this recipe will be having enough pickles left at the end of the 4 or 5 days to actually freeze- if you can resist nibbling along the way!


Pin It

Wednesday, March 9, 2011

Hummus (Chickpea/Garbanzo Bean Dip)


Although almost every food blog or website has a recipe for hummus, I decided to add one of my versions to the mix.  This is a Middle Eastern food that is popular all around the world for good reason. It is extremely nutritious, and also full of flavor with so many different ways to vary it. It can be as simple or as complex as you wish. Another added plus is that it is so easy to make. If you have a food processor or  blender, you can whip this up in very little time. Traditionally, it is served with pita, but it is great with vegetables, crackers (I love them with triscuits), on sandwiches, chips, and the list could go on.

Ingredients:

2  15 oz. cans of garbanzo beans, rinsed and drained
2-4 Tbsp tahini (optional- this is a butter made of sesame seeds that adds to the creaminess of the dip)
2-3 Tbsp lemon juice
2 tsp. powdered cumin
1/4 tsp powdered mustard
1/2 tsp sweet paprika
1/2 - 1 tsp oregano
1/4 tsp celery salt
1/4 tsp marjoram
3-4 palmfuls of chopped fresh parsley leaves
3-4 culantro leaves, finely chopped or 4 palmfuls of chopped fresh cilantro leaves
1/2 tsp dried basil
1 1/2 tsp seasoned salt (I like Goya Adobo with cumin or pepper)
2 raw garlic cloves, put through a garlic press or minced very finely
1/3- 1/2 cup plain yogurt
3-4 Tbsp olive oil (more or less)

Blend everything together, adjusting the oil and yogurt as desired until a creamy consistency is obtained. May need to adjust salt depending on your taste. Mix the dip well. Refrigerate for at least 6-8 hours for the spices to blend well.

 This makes approximately 4 cups- if cutting the recipe in half, you do not need to use exactly half of the spices in the recipe- it is quite forgiving and could probably stand to have a little more than half of the spices that are listed in small amounts.

* Another option is to use roasted garlic instead of fresh- put the garlic cloves in a foil packet with a little butter or olive oil in the oven at 400 degrees F for about 20 minutes, or in a frying pan over medium heat on the stovetop until softened and golden brown. Then put through the blender with the other ingredients.

It is also popular to make this with roasted red peppers (various types), as well as sundried tomatoes, a little feta cheese-- let your imagination go wild.

Monday, March 7, 2011

Homemade Yogurt


Yogurt has such a universal appeal and is found in almost every nationality's cuisine. It is easily substituted for sour cream and is so full of beneficial bacteria essential for our bodies to stay healthy. If you strain it longer than you would for making Greek yogurt and keep squeezing out the extra liquid, you can make a yogurt cheese that is like cream cheese. I have wanted to make yogurt for many years. In fact, I bought a yogurt maker about 10-12 years ago. However, since I am a notorious procrastinator with my fingers in too many pots, it was not until recently that I decided I needed to give it a try. Part of the impetus was the rising cost of yogurt and the fact that they are full of sugar. Since my youngest is recently Type I diabetic, I decided it would be good to try making some with Xylitol, since I really do not care for the other chemically altered/produced artificial sweeteners.

Here is the picture of the type of yogurt maker that I used, which holds about 2 quarts or slightly more.

This is basically a small plastic pail with a handle and lid that snaps on tightly, then sets down into a styrofoam insulated tub with an insulated lid.  I have seen others write about putting the yogurt in glass jars with lids and wrapping them up in towels or newspaper to be stored in a small styrofoam cooler or some other type of cooler that is thick (insulated with foam). Others even use a heating pad underneath the pot of yogurt mixture for the required amount of processing time. Basically anything that will help insulate the yogurt for about 8-12 hours will do the job. One of my newly purchased recipe books entitled The Indian Slow Cooker even has a recipe for making yogurt in the crockpot/slow cooker.

Notice I have a thermometer there. It is important to get the milk hot enough to take care of unwanted bacteria, but not too hot to boil or even scald the milk. You will also want to be sure you have brought the milk back down to the right temperature (110-118 degree F, or 45-48 degrees C) or else the culture you add will be killed quickly. There is only a small window of temperature that is ideal for the yogurt bacteria to reproduce.

I used the instructions that came with my yogurt maker because it seemed so easy. For the starter, I bought a small container of plain yogurt with no other additives, preservatives or thickeners. It is recommended in my instruction booklet that you get new starter about once a month in order to prevent problems from an aging culture. I am not sure if this is affected by whether you make yogurt more or less frequently. I kept some of the original yogurt aside to use later and put it in the freezer until needed.

Ingredients:

2 liters of milk (either homogenized, raw, 2 % or skimmed- I used 2%)
1/2 cup non-fat milk powder (optional)
2 tsp plain and unflavored gelatin (optional)
4 Tbsp plain yogurt or 1 packet yogurt culture

Put a 3 liter or 3-quart pot inside a larger pot filled with water (to make a double boiler). Pour the milk into the smaller pot and add the other ingredients, mixing together well. Heat the milk to 180 degrees F/ 82 degrees C, stirring regularly.

Meanwhile, have a sink partially filled with very cold water. After the milk has reached 180 degrees, place the pot in the cold water and  continue stirring and checking the temperature. When it reaches 118 degrees F/ 48 degrees C, add in a packet of yogurt culture or 4 Tbsp of last prepared plain yogurt (or store-bought). Mix well.

Pour mixture into a container rinsed with boiling water. Cover and wrap it up with either towels or newspaper, placing it in a cooler or styrofoam container, or placing it on a heating pad covered with towels.

Curdling requires at least 3-5 hours (some say 7-8 hours). I started mine before bed and checked it about 10  hours later and it was perfect. The longer you let it set, the stronger flavor it may have. However, my yogurt was very mild flavored even being left for 10 hours.

When the yogurt has been allowed to set adequate time, you may test it by seeing how firm it is. If it is firm enough, then stir the contents and then put into other smaller containers that have been dipped in boiling water, if desired. Cool in the refrigerator for at least 2 hours, preferably longer.  When ready to eat, serve plain or with fruit, jam, fruit syrup or other sweeteners.

If you want a Greek-style yogurt, you may take a mesh drainer and line it with doubled cheesecloth. Put the yogurt into the cheesecloth, close it around the yogurt and then squeeze it tightly over the sink to express the extra liquid. You should then place it in a drainer sitting inside a larger bowl (making sure it sits up off the bottom of the bowl enough). Allow it to continue to drain for 2-3 hours. Then again take it and squeeze out any extra liquid. After that is complete, you may then remove the cheesecloth and store it in the refrigerator. The amount of yogurt will be reduced approximately by half from when you started, but it should be very thick.

Yogurt may be prepared from non-fat powdered milk, as well. To make 2 liters of non-fat milk, use 3 cups of milk powder and fill the remainder with water.  Gelatin delays production of liquid when the curd is cut into. Addition of milk powder increases firmness and nutritive value of the yogurt.

There is also a milk-reduction method I just learned about from a fellow food blogger on Spoon and Chopsticks.  Yogurt making is really not hard or time-consuming. It is so much cheaper and healthier to make your own. So be brave and give it a try. Don't procrastinate like I did!!!  Good luck.

Wednesday, January 12, 2011

Cirak or Easter Cheese

This is a traditional Czechoslovakian Easter delicacy.

Ingredients:

1 dozen eggs
4 cups milk
1 tsp salt

Use a heavy saucepan (but not aluminum or cast iron, as they tend to discolor egg mixtures). Non-stick, glass, stainless steel or vitrified porcelain are best. Keep the heat low or use pad heat diffuser to avoid sticking. Pour milk in pan, add salt, break eggs in one at a time, breaking yolks. Cook, stirring slowly, until mixture resembles scrambled eggs. Line a bowl with four layers of cheesecloth and pour in egg mixture. Tie up corners and drain one hour, suspended over a bowl (tie around a faucet and put the bowl beneath it). Place on wire mesh rack or reed mat and weight with a heavy object; press and drain about two hours. Carefully remove cheese from bag to avoid breaking; chill. Can be sliced.

Delicious with a hearty bread toasted and ham.

*Recipe from Mary Jo Heinen from Whole Foods For The Whole Family La Leche League International Cookbook 1981.

Monday, January 10, 2011

Russian Easter Bread (Paska) and spread


This is a traditional bread that you need to start the night before. It is rich and reminiscent of Challah with the eggs, cream and butter, giving a wonderful flavor. The spread is really not hard to make- creamy and slightly sweet with a hint of lemon. To obtain the traditional shape (mushroom shape), you need to bake them in coffee cans.

This recipe makes 3 very large loaves of bread and a huge amount of the spread. Since I did not want to make so many large ones, I reduced the recipe by 1/3. I then divided the final dough into 3 parts and used small coffee cans. If you do not have coffee cans, you might used regular loaf pans and adjust the baking time. Even reducing the spread recipe, it still made a fairly large bowl- approximately 2 1/2 cups of spread.

Ingredients:
  • 2 cups flour (plus more to finish dough later)
  • 1 cup cream
  • 1 cup milk
  • 1 1/2 cups sugar
  • 10 eggs, yolks and whites separated
  • 1 cup butter
  • 1 tsp lemon extract
  • 1 1/2 yeast cakes (3 tsp dry instant yeast)
Directions:
  • Dissolve yeast and 1 Tbsp sugar in 1/2 cup warm water. 
  • Scald milk and cream; while hot, pour over the 2 cups of flour. 
  • When flour mixture is cooled, add beaten egg yolks that have been mixed well with sugar. 
  • Add dissolved yeast and beaten egg whites. Beat thoroughly and put in a warm place to rise overnight- a crock pot on warm (lowest setting) would be good, depending on the type of slow cooker, or in a warm oven with towels around it. 
  • In the morning, add butter and enough flour to make a dough that no longer sticks to fingers. 
  • Let rise for about 1-2 hours. Then divide dough into 3 parts, putting each part into a greased gallon tin can (large coffee cans). 
  • Let rise 2 hours and bake at 350 degrees for 1 hour, or until golden brown.
  • Cool in tins on cooling rack about 15 minutes, then turn out onto rack to finish cooling. 
this is the starter after being in the warmed oven all night

the dough after adding the extra flour and butter


Cheese Spread for Paska:
  • 4 cups cottage cheese
  • yolks of 10 hard cooked eggs
  • 1 cup cream
  • 1 cup butter
  • 1 cup sugar
  • 1 tsp grated lemon rind or 1/2 tsp lemon extract or flavoring
Directions:


  • Press cheese and egg yolks through a sieve- or mash together. 
  • Bring cream to a boil and then cool. 
  • Cream together butter and sugar and add the other ingredients. Mix thoroughly. 


This is now ready to use as a spread when serving Paska.


As mentioned above, I made this recipe by reducing it and making 1/3 of it. It is as follows:

Paska ingredients:
  • rounded 3/4 cup flour
  • 1/3 cup cream
  • 1/3 cup milk
  • 1/2 cup sugar
  • 4 eggs
  • 1/3 cup butter
  • 1/3 tsp lemon extract
  • 3/4 tsp yeast
I needed about 3 3/4 cups of extra flour to get the dough to hold together and not be too sticky. Follow directions as above but reduce baking time to 25 minutes or until golden brown.


Cheese Spread ingredients:
  • 1 1/3 cup cottage cheese
  • yolks of 4 hard-boiled eggs
  • 1/3 cup cream
  • 1/3 cup butter
  • 1/3 cup sugar
  • 1/2 tsp grated lemon rind (or 1/4 tsp lemon oil, may use closer to 1/2 tsp of lemon extract if you don't have lemon oil)
Follow directions as above and refrigerate for at least 45 minutes for flavors to blend well.


*Recipe from Mrs. H. J. Fast in the Mennonite Community Cookbook 1978.

This recipe was shared with the following:
     Simple Lives Thursday #90- A Little Bit of Spain in Iowa

Rhubarb Dessert Sauce


This dish was a new one to me when I came to PA Dutch country and found out that this has been eaten in families many years over ice cream, cakes, etc.  One of my favorite ways to eat it is mixed with applesauce and over sugar cake.This is a great way to use up extra rhubarb- freezes well to enjoy during the winter and other seasons when rhubarb is not available. Some process the rhubarb sauce by canning it, as well.

Rhubarb is an interesting food with a long-standing history of medicinal uses. Originally, the root was used for healing purposes, but now it is more popular to eat the stems. It has been studied extensively over the past few years with some very interesting findings regarding numerous health benefits. Rhubarb health benefits include probable anti-cancer properties, antioxidant, antiinflammatory and antiallergy properties among many others.


Ingredients:
  • 2 cups water
  • 1/2 cup sugar
  • 3 cups rhubarb, cut into 1/2 inch pieces
  • 3 oz. package gelatin, red raspberry or strawberry

Directions:
  • Combine water and sugar. 
  • Bring to a boil. Add rhubarb. Boil about 5 minutes, until rhubarb is soft. Remove from heat.
  • Add gelatin. Stir until gelatin dissolves. 
  • Chill several hours before serving.

Recipe given to me by Midge Gerlach.


Alternate recipe:

Ingredients:
  • 6 cups diced rhubarb
  • 6 cups water
  • 1/2 cup minute tapioca
  • 6 oz. package strawberry gelatin
  • 2 cups sugar
  • 1 quart fresh strawberries, chopped (optional)
Directions:
  • Cook rhubarb with water and tapioca until rhubarb is soft and mixture has thickened. Remove from heat. 
  • Stir in gelatin to dissolve. Add sugar and mix well. 
  • When partly cooled, fold in strawberries, if desired. 
Serve with waffles, ice cream or cheesecake.    Makes 4 quarts of sauce.

*Recipe from Mabel Weaver & Marilyn Weaver in Lancaster County Cookbook 1993.

Sunday, January 9, 2011

Indian Raita (Cucumber Sauce or Dip)

This is great with curry and as a dip for naan (Indian flatbread). This recipe was  from King Arthur flour company recipes.

Ingredients:

2 cups whole-milk yogurt, drained in a yogurt cheesemaker or cheesecloth for several hours
1 tsp salt
1 1/2 cups finely diced or grated, peeled, seeded cucumbers (about 2 medium cucumbers)
1 clove garlic, peeled and minced
1/2 tsp cumin
2 Tbsp minced fresh mint and/or cilantro, plus extra for garnish
2-3 tsp minced hot chilies or chili paste, or 1/4 tsp cayenne pepper (all optional)

Place the minced or grated cucumbers in a strainer, and sprinkle with the salt. Let cucumbers drain for several hours, stirring occasionally. Discard the liquid.  Mix the cucumbers with the drained yogurt and the remaining ingredients. Refrigerate, covered, for a few hours, for the flavors to meld. Garnish with fresh mint or cilantro.  Yields about 3 cups.

Thursday, January 6, 2011

Lemon Curd


Lemon Curd is the quintessential English tea condiment for scones, crumpets and whatever other type of breads that are served. It takes a simple time of tea and scones to another level. The is the classic flavor of curd, although I have seen curd recipes that are very tempting made with other types of fruits. The same recipe could be used but substitute the juice of other fruits, like berries or other citrus fruits. Lemon curd is also wonderful when used as a filling for a dessert tart made of shortbread or small individual tarts, or on top of thumbprint cookies/shortbread cookies. I have seen some people recommend bottled lemon juice because the acidity is standardized. However, I believe the fresh juice and rind makes a better product. I personally don't want to use bottled lemon juice and still need to grate a lemon for the rind- I would rather use the entire fruit.

There are also so many methods to making the curd, but it really will work any number of ways. I think this is one of the easier ways to make it and still have great results. If you have a problem and some of the eggs curdle or clump, just pour it all through a fine mesh sieve at the end.

Ingredients:

  • 3-4 medium- large lemons- about 1/2 cup of juice (microwaving the lemon for about 10 seconds makes it easier to juice)
  • rind of the lemons, grated
  • 3 eggs
  • 1 stick of butter
  • 1 1/3 cup sugar

Directions:

  • Wash lemons and grate the rind firmly but careful not to get any of the white pith. 
  • Place the lemon juice, grated rind, butter and sugar in a glass bowl set over a saucepan of hot water (or just use a non-reactive saucepan). Stir until butter has melted and sugar dissolves. 
  • Remove from heat and cool slightly.
  • Beat the eggs in a separate bowl and add slowly to the lemon mixture, stirring all the time with a wooden spoon or non-metal implement.  
  • Return the bowl/pan to the medium heat and cook (do not allow it to boil), stirring occasionally, until the curd thickens and coats the back of the spoon. 
  • Pour into cleaned warm 1/2 pint jars and cover.
Makes about 1 1/2 - 2 cups.

 This can be kept in the fridge for about 2-3 weeks or it can be canned in half pint jars via a hot water bath for 15 minutes. If it is stored for more than 3 month, there is a chance it will darken in color, but the flavor will still be great.